Sometimes, young (and old…) woodworkers can use a little help sawing a board accurately, especially if the board must have a specific angle or length. A miter box helps a woodworker saw a 90 or 45 degree angle into a piece of wood. They are cheap to make, easy to modify and cut accurately.
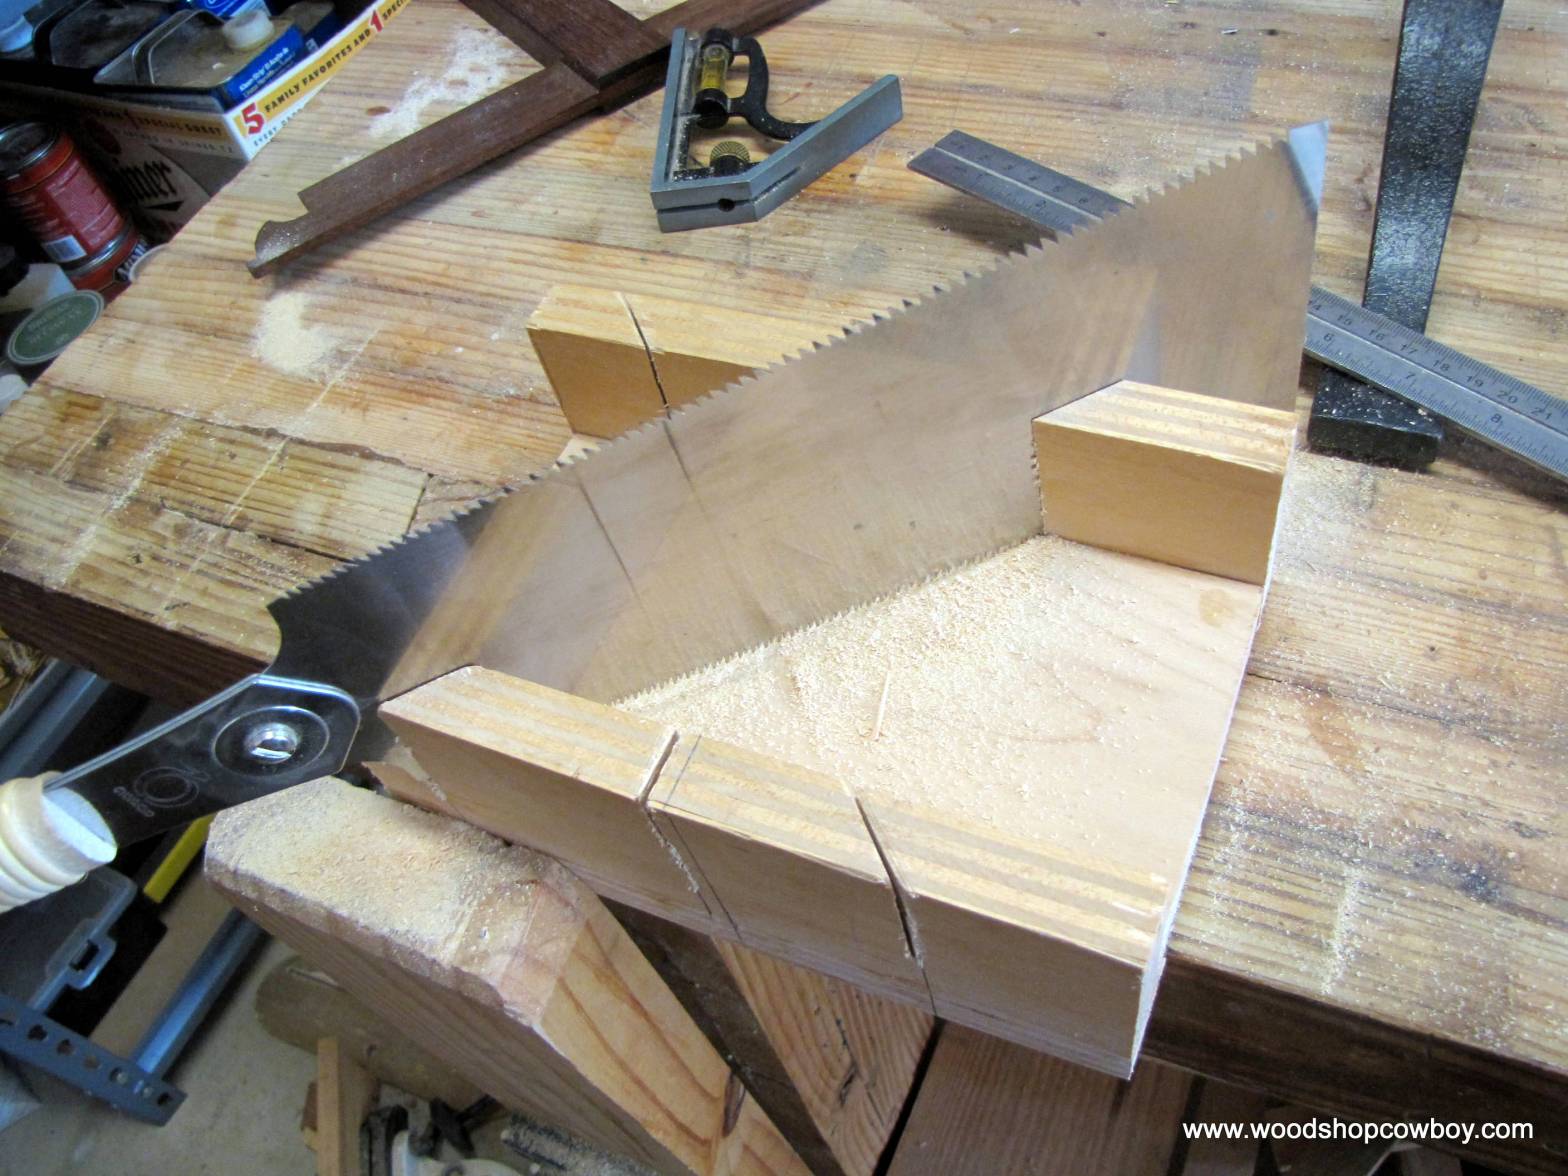
Miter boxes are channels with slots cut into them. The slots guide the hand saw blade for accuracy and precision. The sides allow the user to clamp down the miter box and work pieces to the table or work bench, which greatly increases safety.
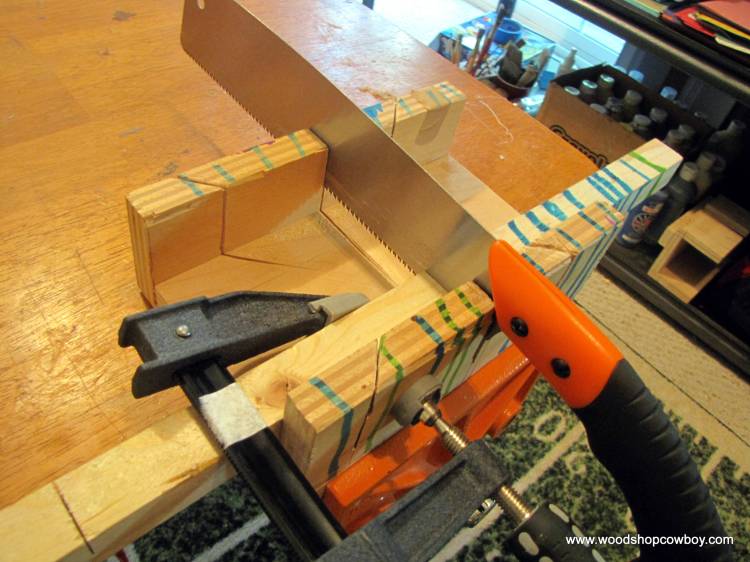
To use a miter saw, place your work piece in the channel, with your cut line against the kerf of the wood. Use a clamp to clamp the work piece and miter box to the table, as shown. Then place the saw in the cutting slot and saw away!
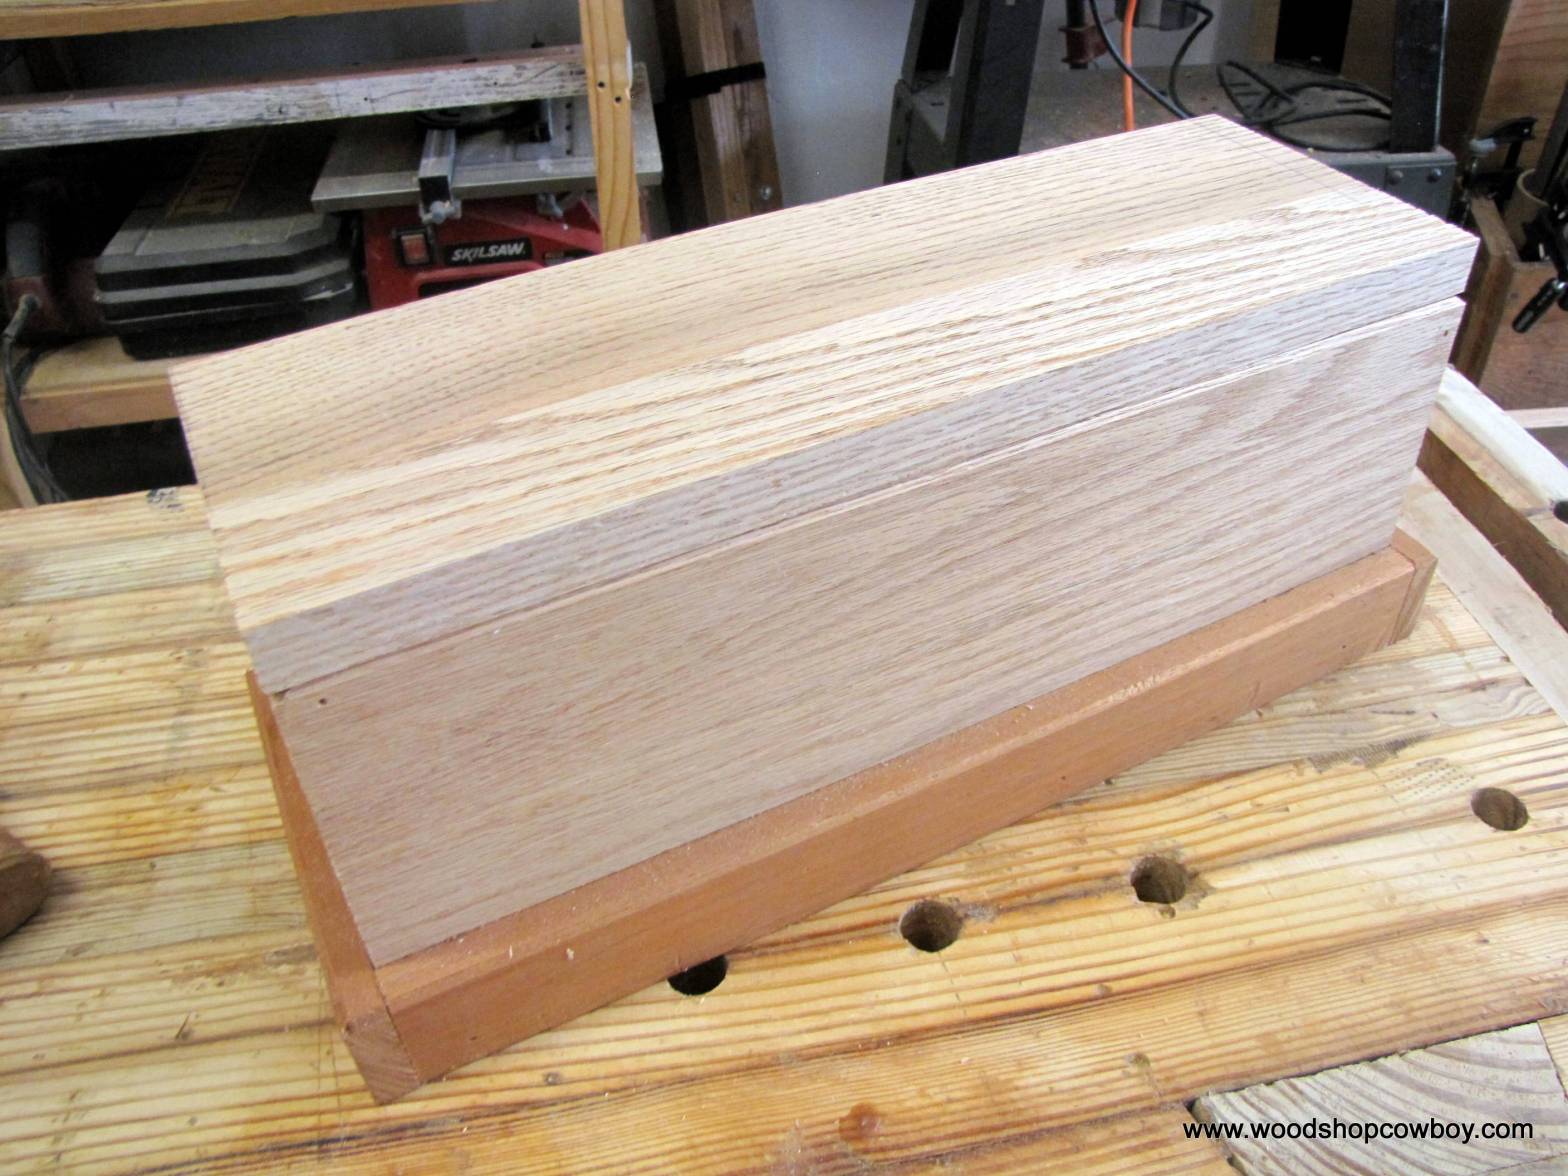
Measure the long side, then secure with glue and nails.
Clamping the Assembly
Parts of the bread box project laid out.
This quick project makes a great starter box for grown woodworkers, but it especially shines as an approachable young person skill builder. This slick box teaches three major skills: measurement, accuracy in manufacture of parts and joinery. A teacher or parent can use this simple project to differentiate between beginning, intermediate and expert woodworkers by adding complexity in the appropriate areas.
This slideshow requires JavaScript.
The following instructions describe how to build this project with pre-k to 2nd or 3rd graders. The adult preps the wood, while the student assembles the pieces, learning to use a hammer, nail set, hand drill and hand plane. Older students can measure and cut their own wood using appropriate tools.
Northern Virginia hosts a handful of makerspaces, with all different working models. I’m spending the next several months visiting as many makerspaces as possible. You can catch my Manhattan tour here!
Northern VA hosts a number of makerspaces. I’m going to focus on the two non-profit makerspaces, Nova Labs & Makersmiths.
Rachelle Dooley of TinkerLab is one of my go-to arts blogs and one of my favorite small-person maker-educators. She has a fantastic book, Tinkerlab: A Hands-On Guide for Little Inventors, and blog, TinkerLab. She recently posted a skill building tutorial for glue guns in small hands. Check it out here.
My boys and I took her idea and moved it over into the “Dad” realm. We used natural materials, stone, sticks, bark, and some scraps from a recent rocking chair repair to create some “rock gardens”.
According to my sons, dragons eat the rocks that grow in rock gardens. And if dragons derive energy from rocks breaking apart, that means they have somehow created controlled nuclear reactors in their stomachs. Which is the start of a Hollywood Sci-Fi movie script, and if it’s not, it should be.
After the jump, check out a few tips and safety pointers for glue guns at different developmental levels.
The last five years have seen an explosion in Maker Edu-themed products geared for the younger set. Young kids make enthusiastic makers. They love challenging puzzles, approachable crafts and as long as you put flames on it, they think everything you do is amazing! What’s not to love about teaching the pre-K through 3rd grade set?
Little makers also need encouragement, support and developmentally-appropriate materials to be successful. Many of us think Makers means 3D printers, microcontrollers and fancy toys. Young makers will feel left out (though amazed) at all those cool gizmos and flashy parts because the concepts, skills and tools are all too complex. Instead, we can broaden our definition of making (to include art, crafts, woodworking, cooking and more) while developing technology tools that teach at their level. Technology tools can empower our children through exploration and discovery.
Robot Turtles and the BeeBot/BlueBot are two MakerEd platforms you can use to promote foundational computer science concepts and coding skills to the very young learners.
My sons love treasure boxes. It doesn’t matter if the boxes are big, small or medium-sized. Nor do they care to actually keep track of their little treasures or can they be bothered placing stuff in them. They have far more fun collecting, designing and imagining treasure boxes.
As I detailed in my most recent post, 123D is a free suite of CAD tools for the creative maker/designer. It acts as an introduction to CAD modeling for beginner and intermediate users. Through 123D, a maker can design, sculpt, repair, share and modify 3D models in industry standard file formats. You can even scan real-world objects into digital models!
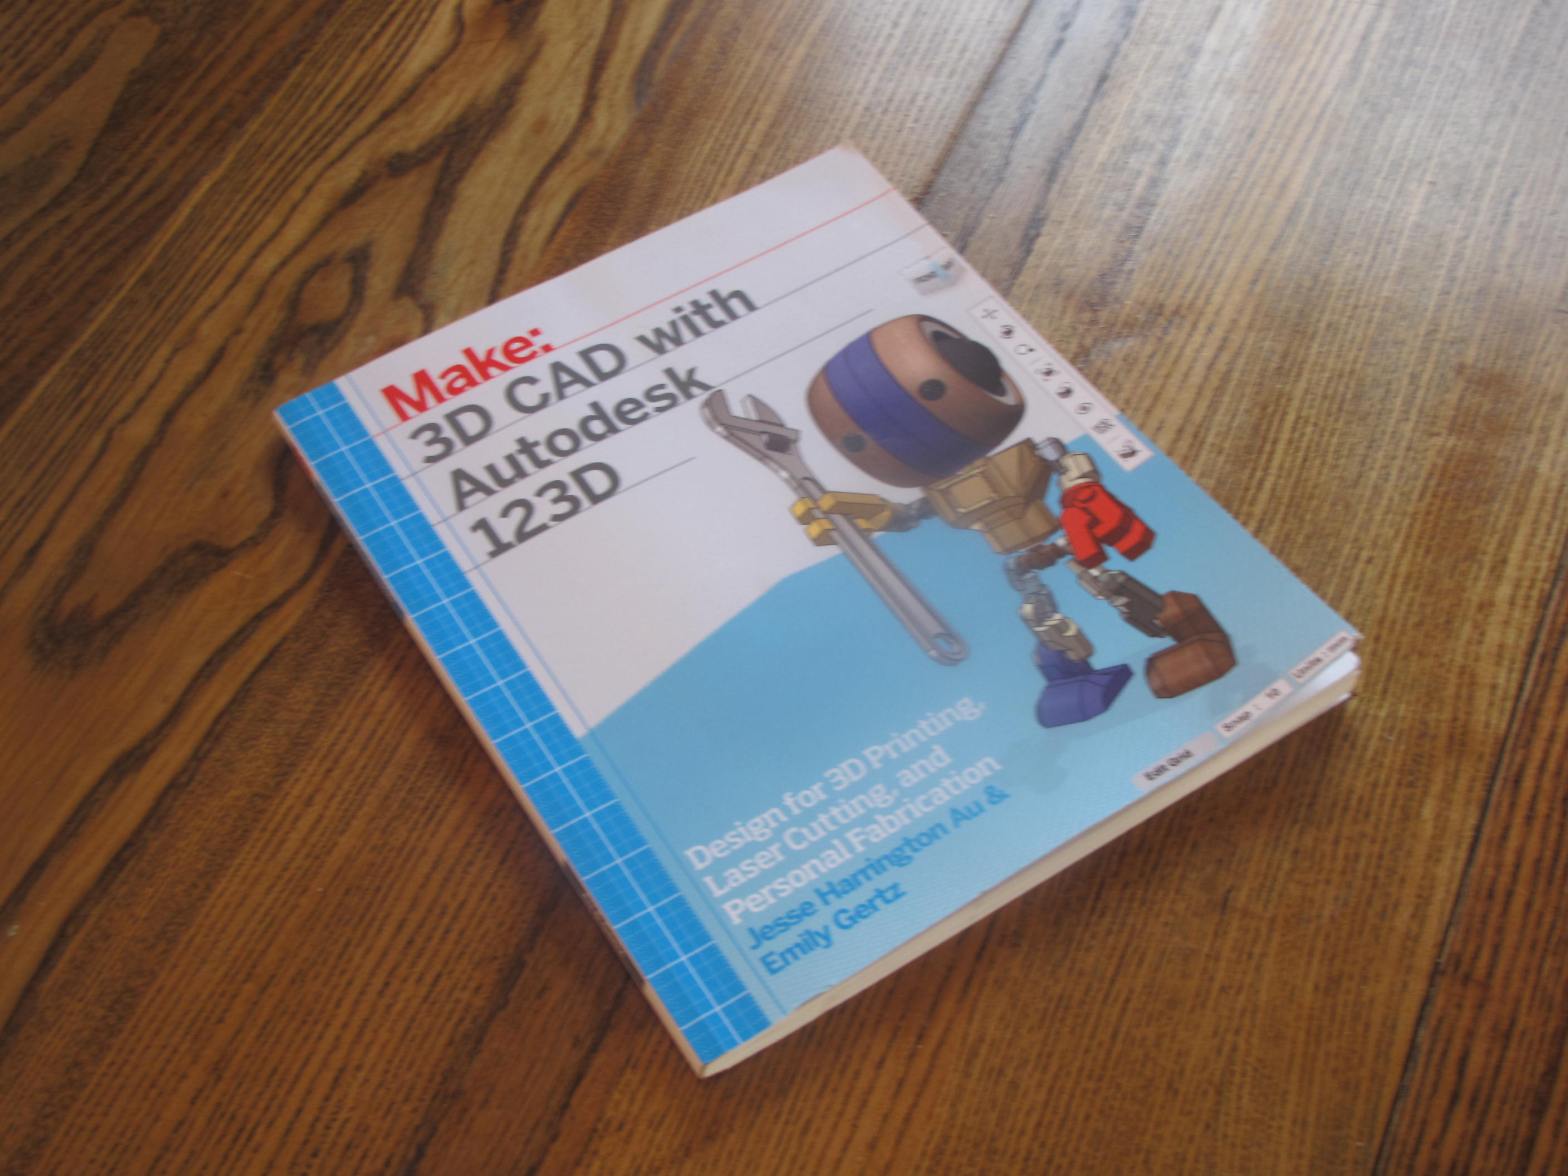
Au & Gertz quickly run through the top five 123D apps: Sculpt+, Meshmixer, Design, Make, and Catch. They break down the basic tools and capabilities of each software with clear pictures and language.
Sculpt+, Meshmixer and Design have simple projects and exercises attached to their sections to encourage the reader to become familiar with the tools. Unfortunately, the skills, challenges and projects are not laid out in a “learning friendly” way, rather presented in a slipshod fashion which promotes confusion rather than clarity. Lastly, each section is too, too short. Sculpt+, a tool with limited distribution due to its OS (iOS only, recently for Android), is presented with the most detail. Meshmixer & Design receive very little love as compared to their impact in the hobbyist maker lab or classroom.
used with creative commons license. Original photo owned by babbagecabbage @ flickr.com
Overall, 3D CAD with Autodesk is little more than a printed out version of the help files in each software with different illustrations. Not enough to help a CAD novice learn a software, not enough to help a teacher design a curriculum unit.
Thank you for your continued support.
Thank you for visiting my blog. To support for this site, please like WoodshopCowboy on Facebookor follow me on Twitter. If you are interested in making and education, why not check out Work Notes, a semi-curated set of articles from the web, published every week?
This week I took some time to explore Autodesk’s 123D family of CAD/surface modeler/maker-magic software. 123D uses cloud-based social community and project storage to allow makers to sculpt, design, manufacture and share complex 3D parts. Autodesk worked hard to provide a free, intermediate level CAD ecosystem which was free and accessible to the beginning to intermediate user.
Autodesk’s 123D is one of the most mature software families (6 years and running) and serves as a stepping stone to professional level CAD software. It is appropriate for intermediate skill hobbyists and students with previous CAD experience. I have had the most success using this software with upper middle and high school students.
I love the concept and the capabilities of the software suite, but the execution leaves something to be desired.
Makerspaces are spaces where people make interesting things, projects they become passionate about. In designing makerspaces for school or home, I like to think about capabilities, rather than specific tools or materials. Makerspaces can have a woodshop, or it can be a 3D printing paradise. A makerspace can be artistically bent collection of crafts for the very young, or a sophisticated workspace dedicated to electronics. The passion and learning matters in the makerspace, not the tools. But the tools certainly help. And they are super fun to play with! This is part of a continuing review of maker tools for use in the home or classroom makerspace with an eye towards young people.
The 123D Suite can be divided into two categories: programs to design with and programs to make with.
Programs to Design With
Sculpt+
Sculpt+ allows makers to create complex characters and creatures which can be exported for animation, 3D printing and other creative pursuits.
Strengths & Uses: This software allows artistically-bent artists to design organic shapes and objects. I’ve found this program quick to start, fun to play but very difficult to master. It might have something to do with my artistic ability, which resides somewhere between “non-existent” and “goofy-dad-folk-art”. I can see this as a great tool in an art-centered studio or makerspace with older students (upper-middle and higher) who want to take their work to the next level.
Limitations: only iOS & Android OS, best used with stylus/touchpad. If you don’t have the right software, you can’t sculpt.
Catch
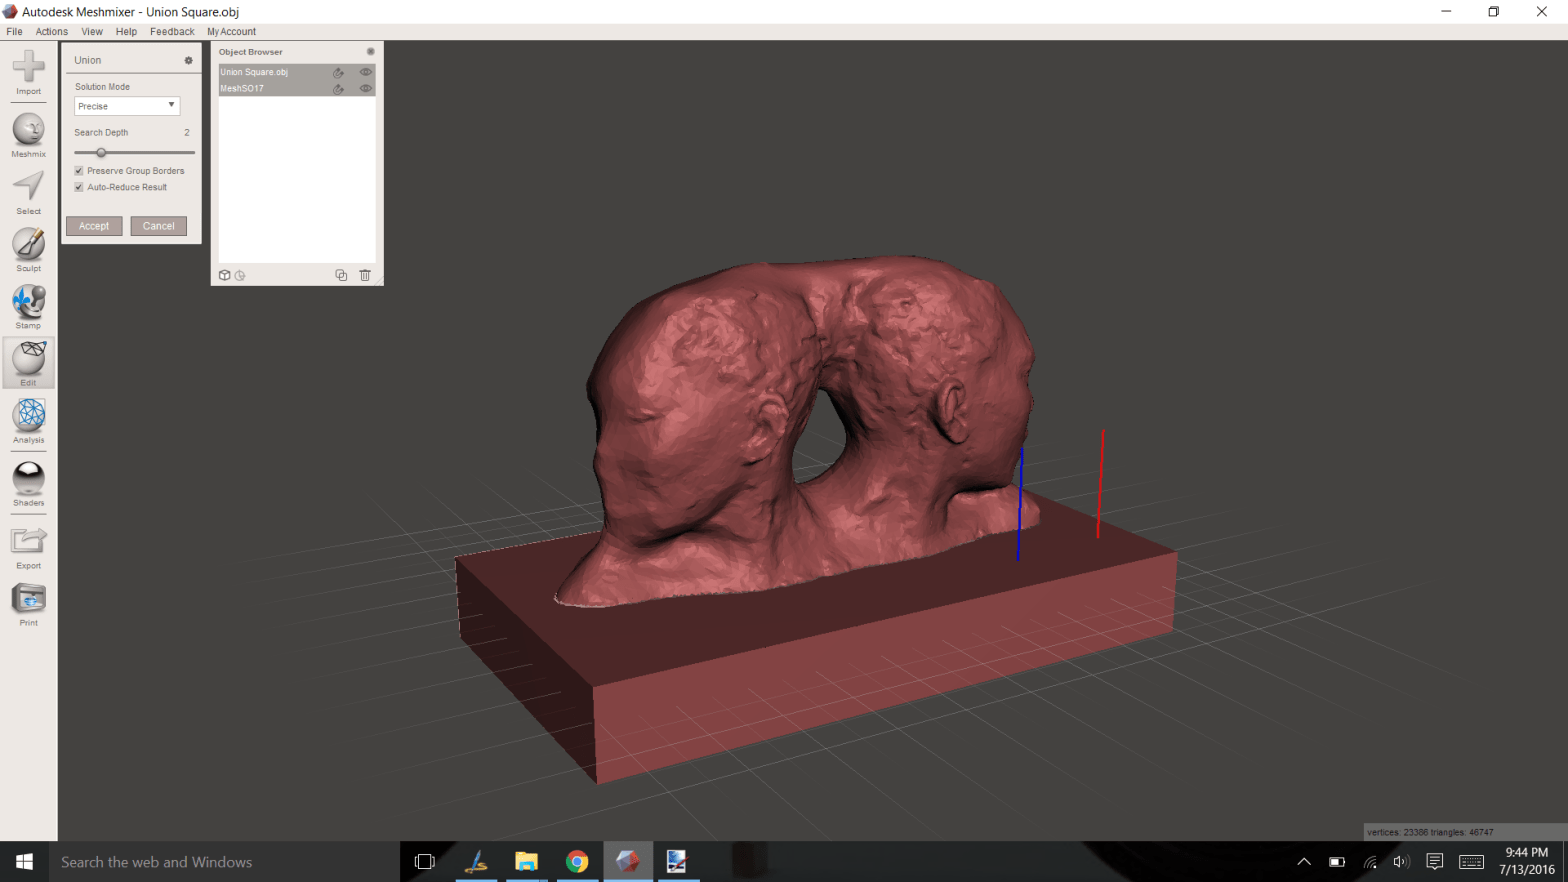
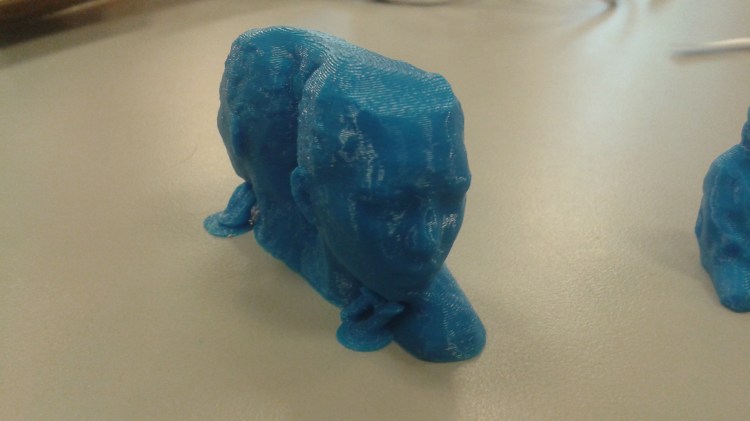
Catch is a miracle program: the user takes pictures of a real-life object and the program will generate a 3D “capture” of the object. When integrated with other software, this program creates 3D selfies, captures public art and really lights a fire in a maker.
Limitations: Great idea, many, many bugs. Catch utilizes cloud-computing, which may or may not work depending on a number of factors. First and foremost, the user must take roughly 8 to 20 pictures of an object in a clear space with great lighting. Interrupted internet service on the user or by the cloud server will stall out the process, long downloading and processing times wear on you and many times your photos don’t even work. I tested two objects; a person and a large statue. I spent a total of five hours trying to move from photo to usable file for printing.
Lastly, Catch will eventually become ReMake for the PC. I’m unsure the plans for the iOS version, but designing curriculum around unsupported software is asking for trouble. If you are a PC-centered classroom, use at your own risk.
Strengths: It worked. Great photographs make strong captures make great prints. A definete plus
Design:
Do you need an exactly-measured part, such as a phone case or servo mount? Do you want to give your kids a taste of semi-professional CAD tools? This is the program for you!
Limitations: Clunky visual system. I grew up as a CAD user in the SketchUp ecosystem. When I began teaching CAD, it was the only free software out there. It took quite a while for me to used to Autodesk’s workflow: workplanes, sketches and Boolean operators. I’m still not well versed, but I don’t feel the need to table-flip my computer every twenty minutes anymore.
Strengths: Free. Upgrades into professional/educational standard CAD programs. Integrates seamlessly with most 3D printing software, such as Makerbot Desktop or Cura. Exports in .stl & .obj for uploading on www.thingiverse.com or other 3D libraries.
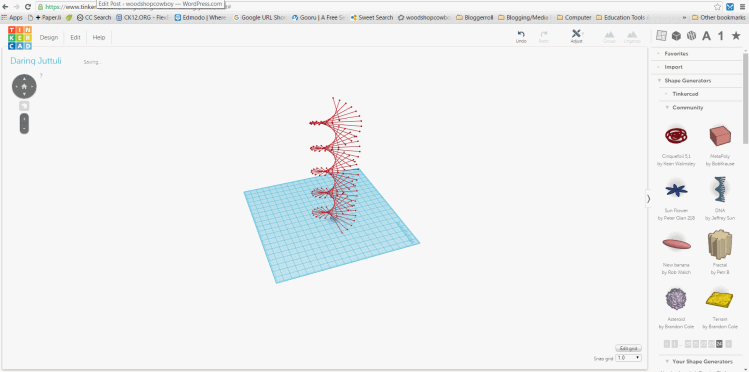
TinkerCAD
Can’t download or install programs on your computer because your IT guy can’t do his job right? Don’t really need to create something incredible, just a quick part? Need something for the absolute beginner?
Strengths: Great, integrated tutorials. Access to a huge project library. Low-threshold, high ceiling, uses building blocks for more power software. Easy to use toolchains. Completely online and browser-based.
Limitations: Limited constructive ability. TinkerCAD uses primitives as its main building tool and allows the user access to two Boolean operators, add and subtract, to create more complex shapes. Super users can program custom scripts
Programs to Make With
Make
Make creates files for use in vinyl cutters, laser cutters and the like. Any 2D plotter machine can be used to generate sculptures, prototypes and more.
Strengths: Best working program in the entire suite. Easily modified for different machines and situations. It reads .obj and .stl files, exports in multiple sheet PDF or DXF, so it coordinates with most laser cutters, CNC machines and vinyl plotters. Highly recommended.
Meshmixer:
Meshmixer can do it all: modify models, sculpt characters, prep for 3D printing, even build models from the ground up.
Strengths: Fantastic 3D prep tools and preview capability for 3D printing. Meshmixer can take captures from 123D Catch or SketchUp and create “water-tight” models ready to be printed. Utilizes many of the same organization tools in the 123D family, which means as you increase your skills in one (especially 123D Design) you increase your skills here.
Limitations: Crashes all the time, so constantly save your work. Many of the same issues with 123D hold true here – clunky visual system. The select tool is a big mystery. Selecting parts/portions of a model can feel like an exercise in futility. Documentation from AutoDesk is non-existent, though documentation from users is available.
Thank you for your continued support.
Thank you for visiting my blog. To support for this site, please like WoodshopCowboy on Facebookor follow me on Twitter. If you are interested in making and education, why not check out Work Notes, a semi-curated set of articles from the web, published every week?
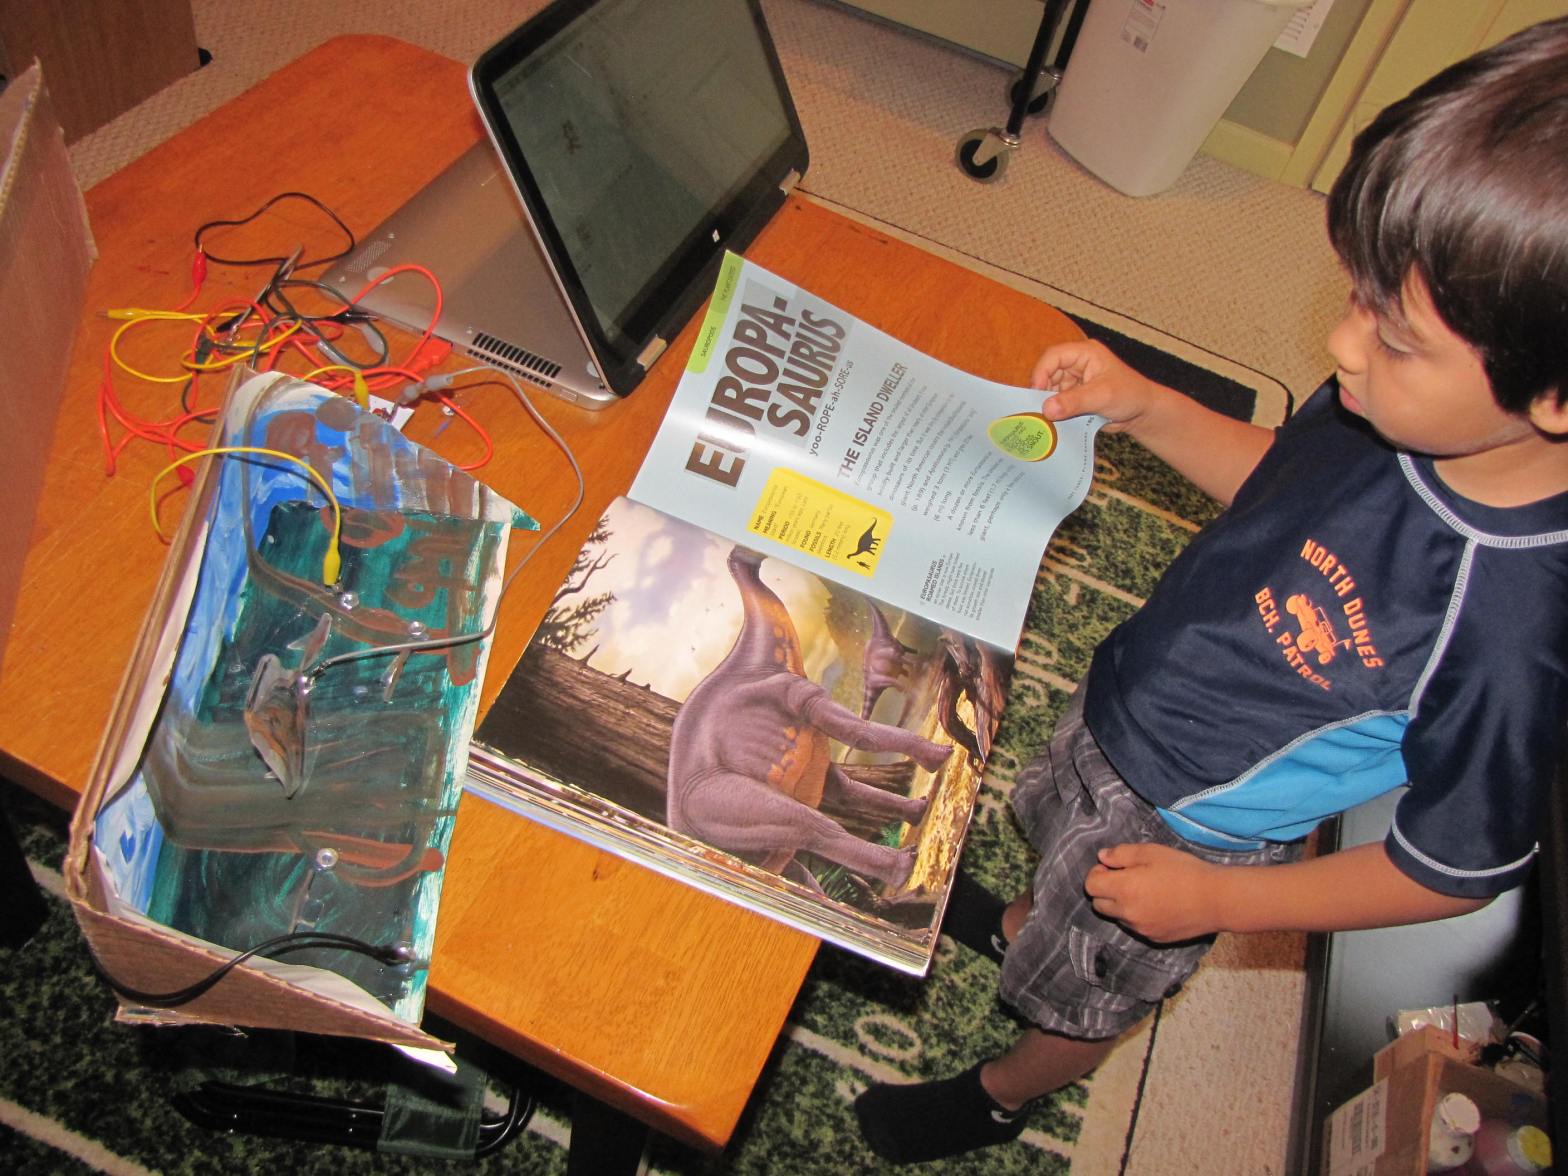
Here’s a cool project that takes an old standby, the diorama, and adds a little Maker flair to it. The diorama incorporates a MakeyMakey, laptop and Scratch programming environments to turn a stand alone display into something interactive and easily modified. I developed this project for my school’s eSTEAM Fair (environmental, science, technology, engineering, arts, mathematics). It was a huge hit with parents and kids alike.
This summer I repeated the project with pretty cool results with my two sons. Let me take you along for the ride!