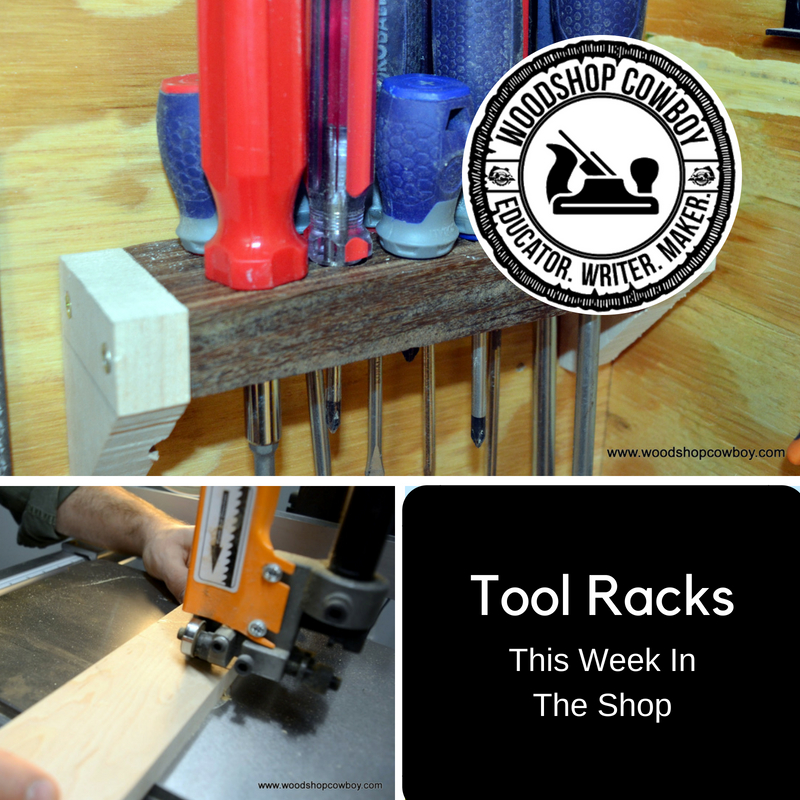
This Week in the Shop we build tool holders for my recently installed tool wall. An organized workspace is a functional workspace, especially in community shops. When everything has its place, every part of the shop seems to work quicker. So this week, I put together a few tool holders to put up some screwdrivers,Continue reading “This Week in the Shop: Tool Rack”
Category Archives: Small Projects
Home #Makerspace: Paper Airplane Launcher
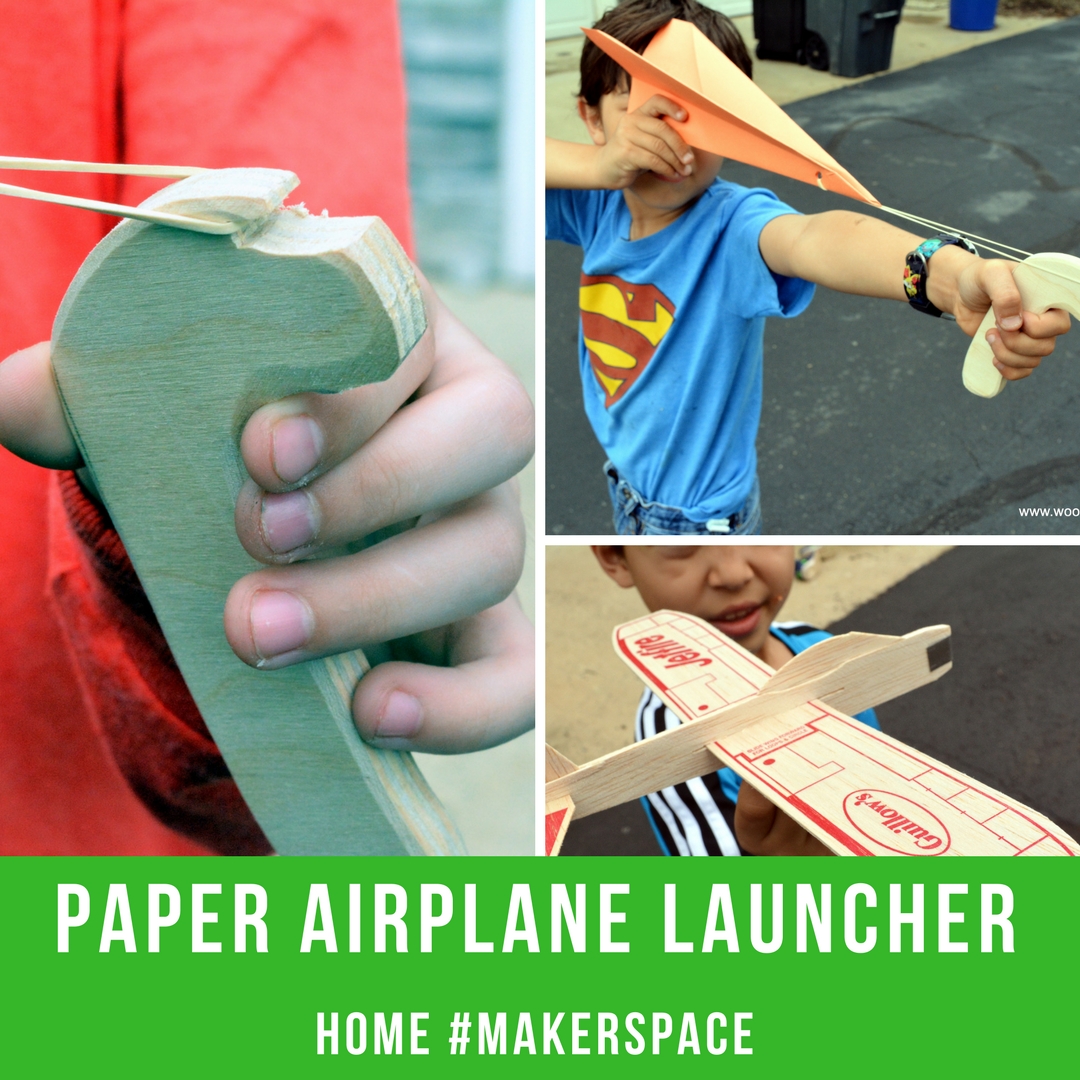
Here’s a quick project to cut out on the scroll saw. Scroll saws are small, cheap, versatile tools that can cut through all sorts of thin materials, such as plastics, wood, plywood and cardboard. They have a very, very low risk factor for younger makers too. If you don’t have access to a scroll saw,Continue reading “Home #Makerspace: Paper Airplane Launcher”
Home #Makerspace: The DIY Folding Board

Some things are impossible, such as unicorns, bipartisan agreement on the greatness of bacon and getting small boys to fold their clothes. While I didn’t do the impossible this week, I certainly made it easier to master. A folding board is a cool little device that helps you fold clothes quickly. This is great forContinue reading “Home #Makerspace: The DIY Folding Board”
Home #Makerspace: A DIY Carrom or Marbles Game Board!

This week, we built a game board which you can customize to play marbles, skittles, carrom, billiards, pool, shuffleboard, crokinole and more! My game board features two games, marbles and carrom. Marbles has been played for thousands of years in various forms. Carrom is a “strike and pocket” game that evolved in East India. BothContinue reading “Home #Makerspace: A DIY Carrom or Marbles Game Board!”
Home #Makerspace: DIY Knock Hockey Set

When the ice melts from the first burst of spring, the hockey fun doesn’t have to stop. Take hockey inside with DIY Nok Hockey, a wood table-top game which makes for hours and hours of fun.
Home #Makerspace: Slingshot #Scouting Project

Make a sling shot in today’s Home #Makerspace How-To article
This Week in the Shop: DIY Height Gauge
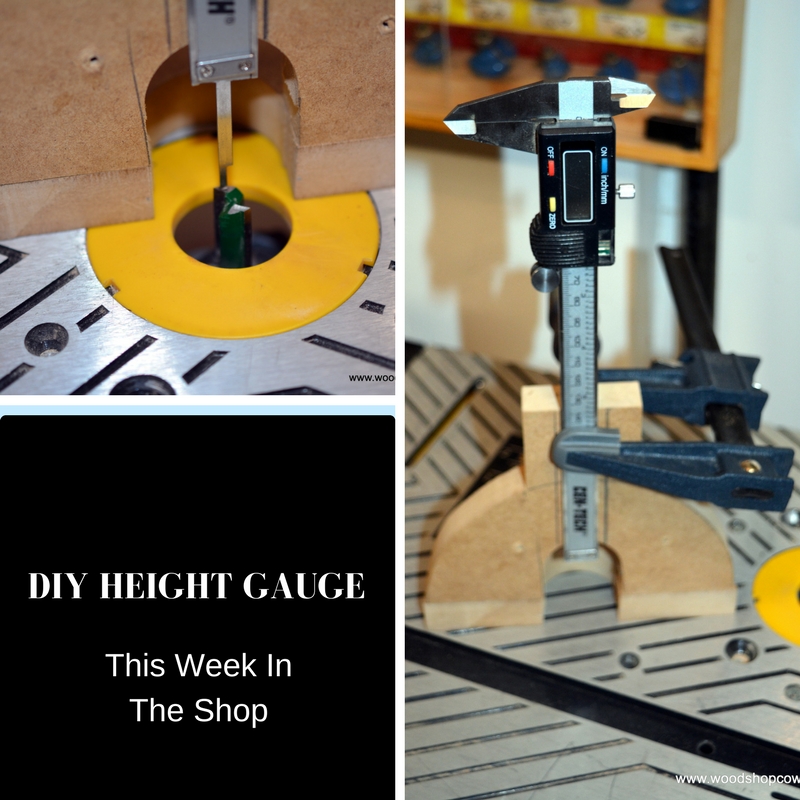
A quick jig can make the difference in a woodshop. This height gauge helps measure and set cutting tool heights and thicknesses for rabbets, dadoes, chamfers, etc. Since it incorporates a digital caliper, the dial is easy to read, precise and accurate. This tool came in handy building the light box project – I hitContinue reading “This Week in the Shop: DIY Height Gauge”
Home #Makerspace: How to Make a Light Box for Art and Play
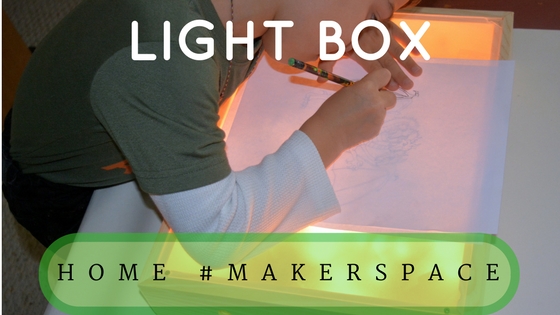
This week, art class happened at night. Using some leftover holiday string lights and acrylic sheeting, I made a light box for my two young boys to draw, play and design on.
Home #Makerspace: The Fishing Rod Storage Rack

This week in the Home #Makerspace, I designed and built a fishing rod storage rack. Check it out here!
Home #Makerspace: A Small Bookshelf Using Only Hand Tools

This week we will build a small, simple shelf to practice our hand tool skills. We will learn the rip cut and how to use the coping saw successfully. We will assemble and hang our shelf using wood screws, the quickest fasteners around. This project can be completed in a 15 to 20-minute session byContinue reading “Home #Makerspace: A Small Bookshelf Using Only Hand Tools”
