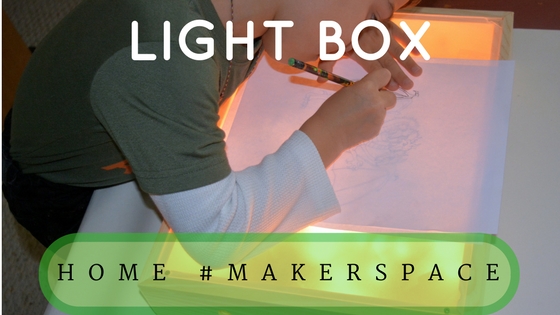
This week, art class happened at night. Using some leftover holiday string lights and acrylic sheeting, I made a light box for my two young boys to draw, play and design on.

Light boxes lend themselves to lots of different explorations. Bits of colored paper become kalidescope-like confetti, simple photographs become complex tracings, colors combine unexpectedly and learn the physics of light. Plant life and structures light up to the biologist. Plus, with a little red and yellow construction paper, you can light a fire for ghost stories!

This tutorial utilizes a table saw to create the necessary rabbets and miter joints. These are great intermediate table saw skills to learn, practice and utilize in your work flow. Strong, clean joinery really sets your project apart from the pack. While kid-focused, this project isn’t really designed to be made with young maker help.


The Light Box
Rabbets are stepped grooves on the edges of a piece of wood, often used in some sort of joinery. Here, I use rabbets to set the top and bottom of the box into the sides for a strong, clean look. Miter joints make a 90 deg corner by creating two perfect 45 deg cuts. In theory, this sounds perfectly easy, but in practice it is devilishly hard. Each corner of a four sided box must match, and each side of a box must match it’s opposite side. I suggest practicing on scrap so you can adjust your machine and technique to create perfect miters.
Materials
- Hardboard panel, 1/8” thick and over 11” long x 14” wide.
- Acrylic sheet, 11” x 14” and under 1””/8” thick. Found at most hardware stores. Thicker sheets work better, so get as thick as possbile for your budget. I had a thin budget….
- No. 2 Common Board. While I had 1”x8” scraps, a 1”x4” would be just about perfect.
- #4 x 3/4” Wood Screws.
Tools:
- Table Saw
- Power drill with Phillips No. 1 driver & small twist drills.
- Pin nailer & air compressor. Or a hammer. Or clamps. Or patience. Or screws. Or joinery….
Assembly:
- Mill your lumber. I used a table saw to trim a piece of hardboard to 11” x 14”, and rip 3” wide pine boards.


- Cut the rabbet. Set the height of your saw blade at 3/8” high. Then, attach a sacrificial board onto your fence. Run the sacrificial fence so it just barely kissed the blade teeth. Using as many safety devices as possible, run each 3” pine board over the saw blade. Rotate the board and make a rabbet on the other side. The rabbet should be just about the thickness of the blade. Check if the acrylic and hardboard fit in the rabbet. If not, nudge the fence over. Lock the fence down and make a second pass. Check for fit.
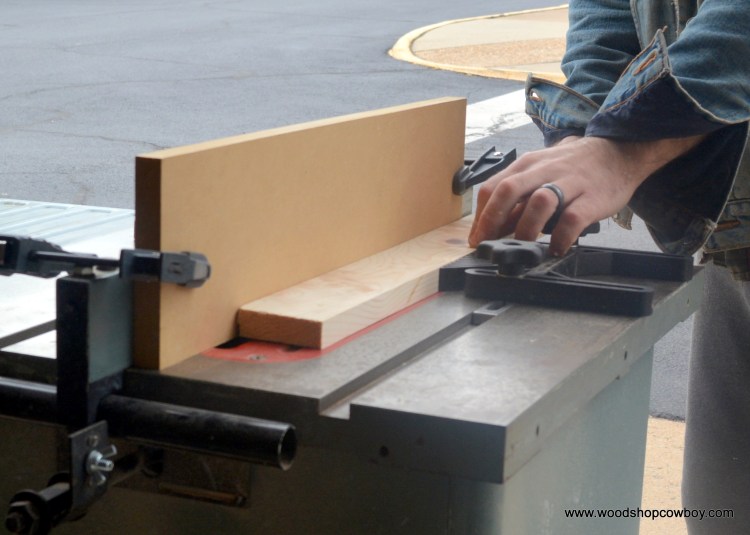
- Measure a 45 deg bevel. Attach a wood fence to your miter gauge. Use a depth stop to trim the 3” wide sides to appropriate length. The short sides have a 12” outside length, while the long sides are 15” long on the outside.

- Cut the groove for the cord. Mark the groove with a square. Use a handsaw to cut the sides and a chisel to clear waste.


- Drill holes for adequate airflow.
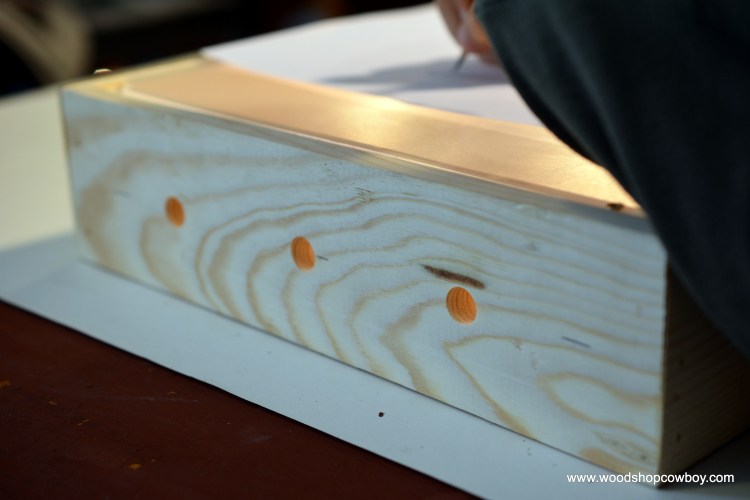
- Assemble your boards. I like to tape the outside corners together, then coat the joint in glue, then fasten with pin nails. This creates a quick, strong joint.


- Attach the bottom and top with #4 x 3/4” wood screws. Drill pilot holes with a small finish nail for a bit, and ream with a countersink for a clean look. Make sure to drop the lights into the box before you close the bottom.


- Take off the top. Peel off the protective film on the bottom of the acrylic sheet. Sand with 80-grit paper to get a nice clouded look. Reattach onto the side, then peel the top layer.


- Plug the light in and race away.


Improvements:
- Thick acrylic and Lexan works best. Thin sheets will flex in use. While cheap, holiday lights give off heat and need air flow to keep cool. While this version uses holiday lights, LED strips give off the same amount of light, but without the heat.
Extensions:
- Find translucent pieces of plastic, such as translucent pattern blocks, and build interesting geometric patterns.
- Examine plant structures, such as petals, leaves, roots, tubers and all the other plant parts I can’t remember.
- Tanagram shadows.
- Paint becomes a light show!
Thank you for your continued support.
Thank you for visiting my blog. To support for this site, please like WoodshopCowboy on Facebook or follow me on Instructables. Twitter, Pinterest or Instagram. If you are interested in making and education, why not check out Work Notes, a curated set of Maker articles from the web, published every week?

A great project that gives young Makers a tool for their imagination. Nicely done