This Week In the Shop: Storage Crate

This Week in the Shop we make a storage crate suitable to store a large pinewood derby track. This crate is simple to build and made out of very cheap materials. As built, this crate costs roughly $75 per crate in plywood and hardware supplies.

This project can be attempted by the beginner, but also offers rewards for the intermediate and experienced craftsperson. This crate modifies easily for a variety of purposes, such as anything that needs serious customizable storage like as oddly-shaped tools, artwork, sports equipment, camping equipment, etc. For example this crate would store a kayak or canoe for long-term storage and transport easily.

Storage Box

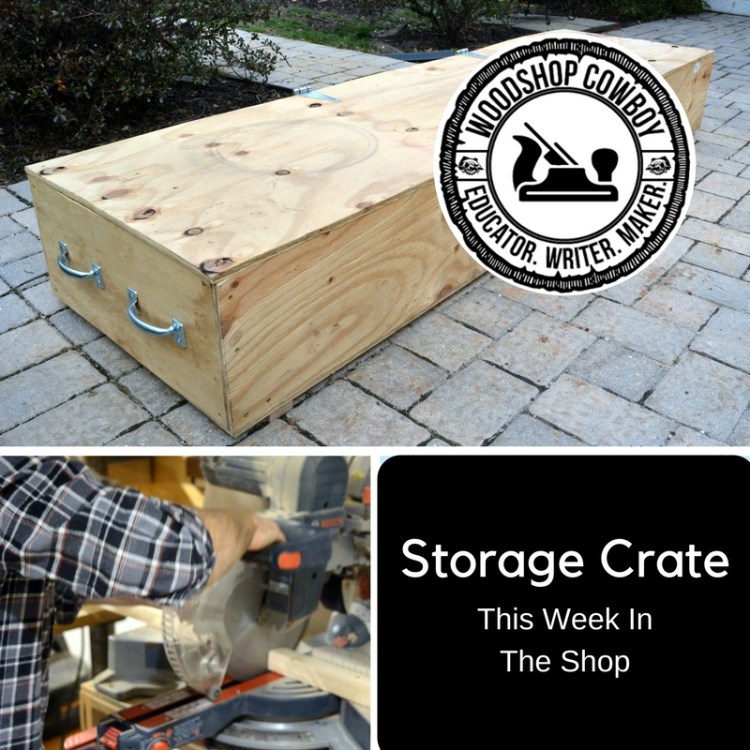
You can find plans at www.besttrack.com. They also sell the a fantastic aluminum Derby track and gate kit which makes the Pinewood Derby a breeze to set-up, execute and take down.


The Storage Crate

Materials:

Per crate:

  • 2 full sheets of plywood, 8 foot x 4 foot by ½ in
  • 1 section of 2x2x8’, construction grade pine
  • 1 section of 1x4x8, common white pine
  • #10-½” screws or construction screws or machine bolts, washers and nuts.
  • 4 utility handles 5 ½” or 6” wide

Tools:

  • Impact drill and drill driver with bits
  • Clamps
  • Circular saw and guide
  • Tape Measure
  • Combination Square

Milling and Dimensioning:

  1. Use a circular and saw and guide cut down plywood to size following best track.com cut list. If you do not have a circular saw or the proper space, most home centers will cut plywood to size free of charge.Storage Crate_1.3.1
  2. Cut the corner bracing to size at the miter saw.Storage Crate_1.5.1
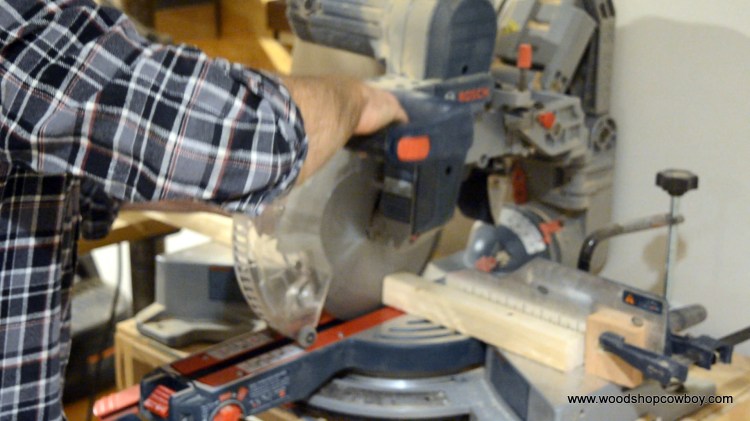
  3. Trim the 1×4 to 86” length at the miter saw.
  4. Trim your hardwood floor straps to length at the miter saw.

Assembly:

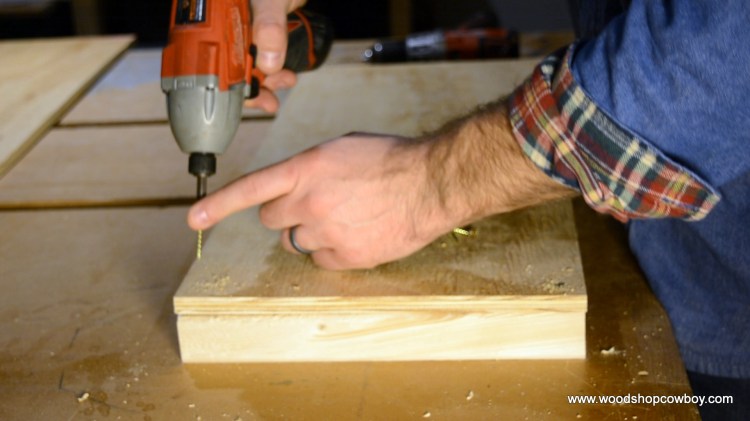
  1. Fasten the short ends to the corner bracing using construction screws and impact drill with appropriate bit. Use a drill with a small drill bit to create a pilot hole in minimize any splitting.Storage Crate_1.7.1
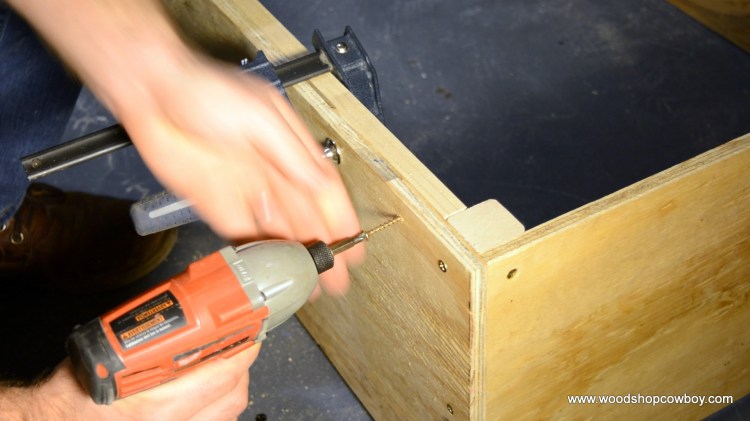
  2. Clamp the corner braces onto the long sides and fasten with construction screws.Storage Crate_1.9.1
  3. Clamp the support rail to the side and fasten with screws.Storage Crate_1.11.1
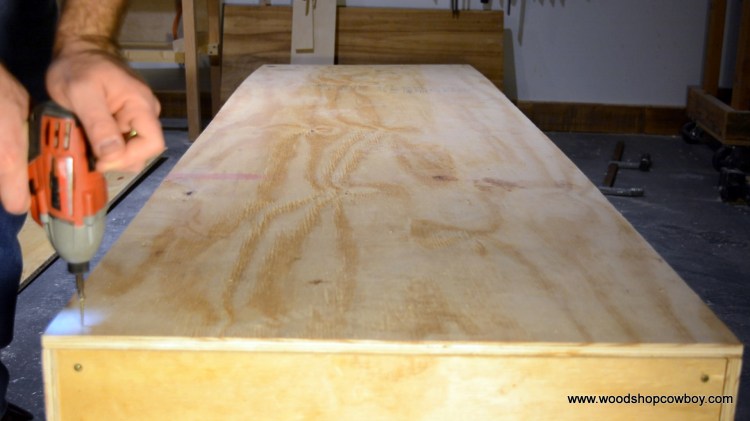
  4. Position the bottom onto the assembly and secure with construction screws.Storage Crate_1.13.1
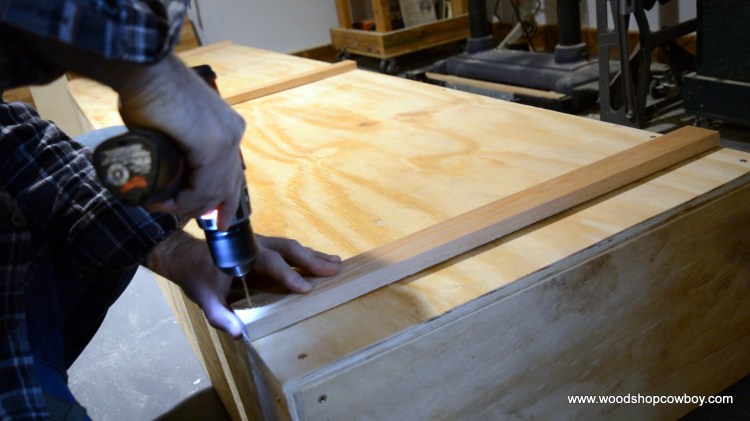
  5. Attach your floor straps with construction screws.Storage Crate_1.14.1
  6. Flip the assembly onto its side. Mark the location of the hinges, 30” from each side.
  7. Using a scrap piece of plywood as a spacer, position to hinge for installation. Use construction screws or machine bolts to install the hinge in the correct placement.
  8. Flip the assembly on to its base, and position the top for installation. Install the hinges to the top with construction screws.
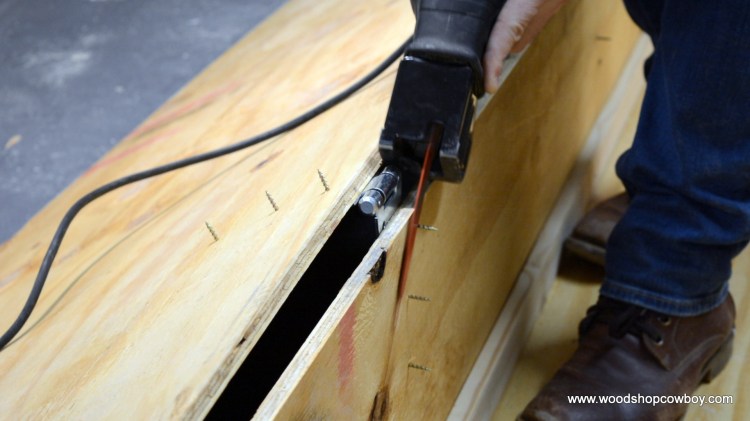
  9. Use a reciprocating saw and blade, angle grinder and cut off wheel, rotary tool or hacksaw to trim any protruding screws or bolts.Storage Crate_1.22.1
  10. Mark a centerline 6” from the top of the assembled storage crate on each end. Mark a cross line 4” in from either side to locate the hinges.
  11. Eyeball handle location and install with impact drive and construction screws. Trim bolts if necessary.Storage Crate_1.25.1
  12. Sand, paint and finish as necessary.

Thank you for your continued support.

Thank you for visiting my blog. To support for this site, please like WoodshopCowboy on Facebook or follow me on Instructables. Twitter, Pinterest or Instagram.

Woodshop Cowboy Rides Again at Maker Faire Nova….

Woodshop Cowboy goes to Maker Faire Nova on Mar. 18th at George Mason University at Fairfax, VA.  You can purchase tickets at nova.makerfaire.com.  Enjoy lots and lots of hands-on exhibits, including drones, blacksmithing, 3D Printing, robotics and of course, woodworking!MAKER FIARE

The full list of maker exhibits is pretty overwhelming.

I will be building a small selection of projects: the simple bench, a pencil box with four corner joinery, the nightstand & and a simple crate…all with mostly hand tools and a few easy types of joinery.  I will also have a number of projects to display, cool tunes and some hands-on demos.  Should be a hoping good time!

You’ll be able to sign up for a mailing list for classes, project kits and plans from www.woodshopcowboy.com.

mmf-reston-068
copyright Maker Faire NoVa

I will also be giving away Inscructables.com Pro Memberships to at the Faire to lucky attendees.  See you there!DSC01748

This Week in the Shop: The Fossil Cabinet

The Fossil Cabinet
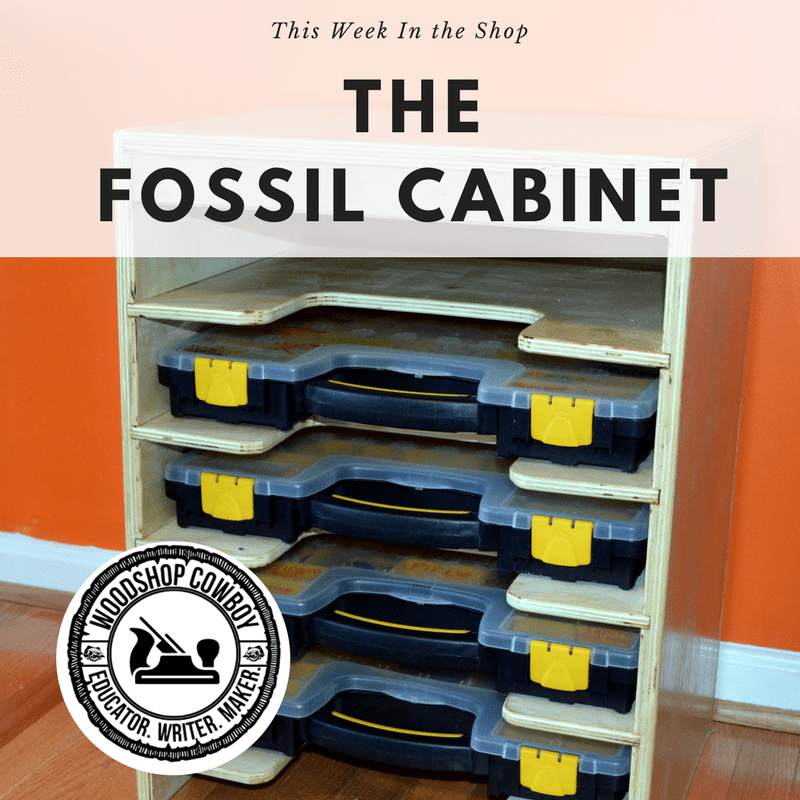
This Week in the Shop we build small cabinet. Cabinet making epitomizes fine woodworking, as it rewards accuracy, consistency, and attention to detail. Cabinets can be found in the workshop, in the kitchen, as furniture, as built-ins. Great cabinets add value to the home and definitely have the wow factor.

While cabinet making may seem like a inscrutable dark art, basic cabinets are a breeze to put together if you have a few select tools. This cabinet build relies on the table saw and the router and showcases the versatility of shellac as a finish.

This particular cabinet will hold my son’s growing fossil & gem collection. Shallow shelves with scoops hold common tool boxes. This would also be a great workshop project and the skills are transferable to other pieces.

DSC_7971

Continue reading “This Week in the Shop: The Fossil Cabinet”

This Week In the Shop: Open Shelving

Open Shelving
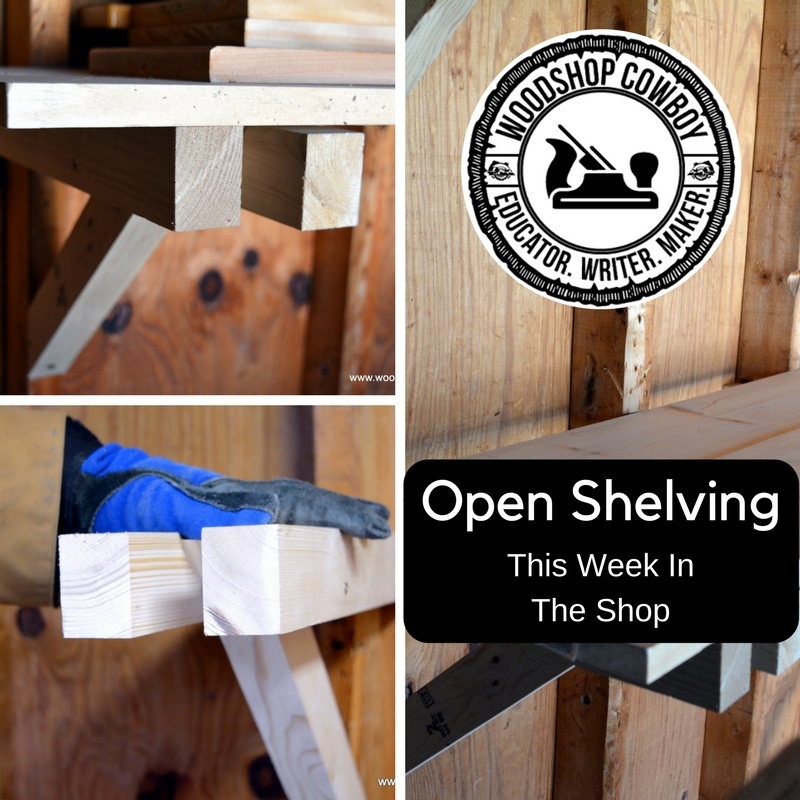
Every woodshop, makerspace or garage could use more storage.  If you have an unfinished wall in a shed, garage or basement, this project is for you! This Week in the Shop we build open shelving using simple brackets made from 2x10s with a table saw, power drill/driver and miter saw.   This project easy to build, cheap to build and useful.  Check out the build video!

Continue reading “This Week In the Shop: Open Shelving”

This Week in the Classroom: The FunKey Super #MakerED #STEM Review

This fall I have introduced a new tech platform into my practice.  The FunKey  unlocks tons of potential in a classroom.

Do you want a board that reads keystrokes and plays like a MakeyMakey but with at a size and price point for a real classroom?

FunKey does that.

Do you now need a board which takes different sensory inputs and outputs as light, sound or motion?

FunKey does that.

Do you need a board which can help you teach programming?

FunKey does that.

Want a kit that comes with a variety of sensors, so quick and easy to hook up, students can create medical devices in a class period?

FunKey does that.DSC_7606

What doesn’t it do?

Teach.  But that’s what teachers are for.

Let’s set up a few projects with a basic kit and see how we can put it to work in the Maker  classroom!


In full disclosure, I received a pair of FunKey Super boards in return for a blog review, but all opinions are my own.  Innovations, on the other hand, those belong to my students.

Continue reading “This Week in the Classroom: The FunKey Super #MakerED #STEM Review”

This Week In the Shop: The Woodshop Cowboy Workshop & Studio 2017

WoodshopCowboy (1)

This Week in the Shop, I will peel the bark off my new digs in Northern Virginia.  Last summer, my family and I relocated to Northern VA to be closer to family and pursue new jobs.  It’s taken a while, but we’ve finally settled into a sort-of-fixer-upper in a great neighborhood.

The Woodshop Cowboy Shop & Studio started as a “finished basement”.  The basement certainly counted as finished, but it was completed with more ambition than talent.  Dropped ceilings, strange design decisions, mismatched materials and poorly fitting doors all pointed to a botched DIY job.

So I DIYed myself out of it.  I unfinished the basement.

DSC_7594
A shot from the entrance.

First, I ripped up the carpet and removed the baseboards.  Then I swept and mopped the concrete floor.  I primered the floor with concrete primer.  I finished the floor with standard grey concrete paint.  I highly recommend this technique for interior slabs.  Saw dust sweeps up beautifully.  The concrete paint takes a beating well.  The paint cures within 24 hours and it’s much, much cheaper than other solutions.

I had to frame, drywall and joint one wall to seal off the furnace from the wood dust.  I painted every wall with a cheap white paint.

Next, I made ripped baseboards, chair rails and tool holder borders out of 2×12 pine rafter stock.  I ripped the stock in half, then resawed them to just under 3/4″ thickness on the bandsaw.  A quick trip into the planer took the baseboards down to 5/8″ of an inch.  A chamfer bit in the router table eased the top corner.

I finished the boards with a 2:1 ratio poly/stain combo.  This didn’t work out as well as I hoped, but a coat of poly seemed to fix up the baseboards.

I also created a number of tool walls consisting of ripped 1/2″ plywood wood sheets, 2′ x 8′ long.  I love the look.

I also accepted new tools in the renovation.  A Grizzly air filter and dust collector help manage dust, while a Grizzly bandsaw replaces the one I lost in my move.  I added a big Bosch crosscut saw.  My small temporary table saw solution, the one featured in a number of projects over the last year, bit the dust recently.  If you read my Table Saw Buyer’s guide, you know what I will be buying next.

I also have access to a small basement office.  Here, I repainted the walls and installed trim.  I also bought a metal shelf from Costco which currently houses my electronics, science, kid-centric maker gear.  A new-to-me Makerbot Replicator 2 & a sawhorse table surface round out the office’s purpose.  I have to add a few bookshelves to house my Maker book collection, but that will probably a few years in the future.

This slideshow requires JavaScript.

As you can see, exciting things are ahead for Woodshop Cowboy!

Thank you for your continued support.

Thank you for visiting my blog.  To support for this site, please like WoodshopCowboy on Facebook or follow me on InstructablesTwitterPinterest or Instagram.

This Week in the Classroom: Top Maker Tools in the Middle School Classroom

My semi-regular column This Week in the Classroom is back!  I have accepted a position in a small, mostly rural school district just outside of Northern Virginia.  It’s great to be in the classroom again, bringing project-based learning to new audiences.connect_usb

I am teaching middle schoolers, all levels.  Middle school is a great age to teach, despite some of the unique challenges the students pose.  Students can really make connections, find passions and dive deep into a project.  They are about as creative as they ever will be and watching a kid’s creative power light up is just something cool.  Middle school is also a fraught time for many young people, making the classroom a place of great promise and great worry.Scratch

Here’s my current greatest hits list of web tools, software platforms and services I like to use in my Tech Ed/Maker Classroom.

Continue reading “This Week in the Classroom: Top Maker Tools in the Middle School Classroom”

This Week in the Shop: Safety Posters

In community shops, safety is paramount.  Equipment can be inadvertentlySafety Posters 
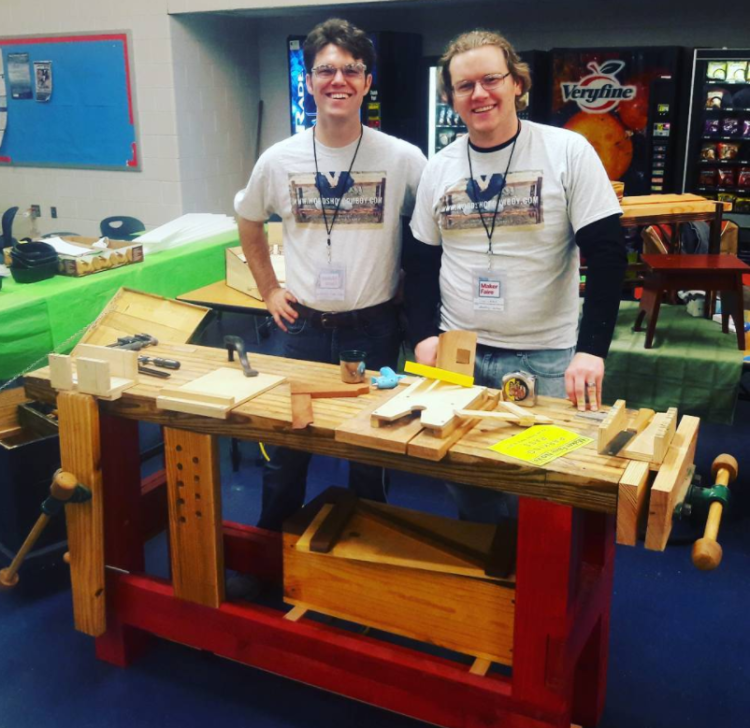
left in poor repair, dusty and worn conditions.  A quick checklist can mean the difference between safe operation and serious consequences.

At Nova Labs in Reston, VA,  it takes a fleet of stewards each donating 5 to 10 hours per week to keep the large, well-used makerspace operating.  As part of this effort, I took some time to design and publish some “Pre-Flight” and “Post-Flight” checklist for tool users on a variety of tools.  Feel free to take a look, remix and reuse as you need.

Pre-Flight

Scroll Saw

Oscillating Sander

Mortiser

Drill Press

BeltDisc Sander

Band Saw

Thank you for your continued support.

Thank you for visiting my blog.  To support for this site, please like WoodshopCowboy on Facebook or follow me on InstructablesTwitterPinterest or Instagram.

Tool Primer: The #Table Saw Buyer’s Guide

In the modern woodshop, the table saw is king. A table saw can rip, crosscut, bevel and miter.  It can create coves, tapers, even cut circles with the right jigs and fixtures.

2

Table saws allow more accurate, precise and repeatable cuts in a multitude of materials.  Even more complex joinery, such as tenons and finger joints, can be created on the table saw.

Which table saw should I buy?  Why buy used?  Why shouldn’t I buy used?  How do I pick out a great table saw?  How do I avoid bad table saws?

Glad you asked.  In today’s Tool Primer, we will walk through the various types of table saws and discuss the different features.  Then, I’ll break down which features I find most useful in the shop.  Lastly, I will discuss the used table saw market.  Lastly, I will make a recommendation of which saw to buy.

Lets get cutting!

Continue reading “Tool Primer: The #Table Saw Buyer’s Guide”