A quick plan and showcase of the latest project to come out of my personal workshop. This is a pot rack for my wife’s very expensive set of cooking pans. It keeps them up and out of the way when I’m working with her hand-me-downs while I’m learning to cook….

The Pot Rack
Materials:
- 10’ of 1”x5” lumber, any species. I had some salvaged hardwood left over from various other projects, so I used that.
- 6 of the biggest “S” hooks you can find at a home center.
- 8 hooks with screw-ends.
- 10’ of decorative chain.
- 4 drywall anchors
I shopped for my materials at Lowe’s, but you can check out my resources list for local suppliers in the Houston metro area. The SketchUp model can be downloaded here.

Construction:
1. Crosscut 3 lengths at 22”. This will create 2 short sides for the rectangle and one stretcher in the middle.
2. Crosscut 2 long sides at 32” each.
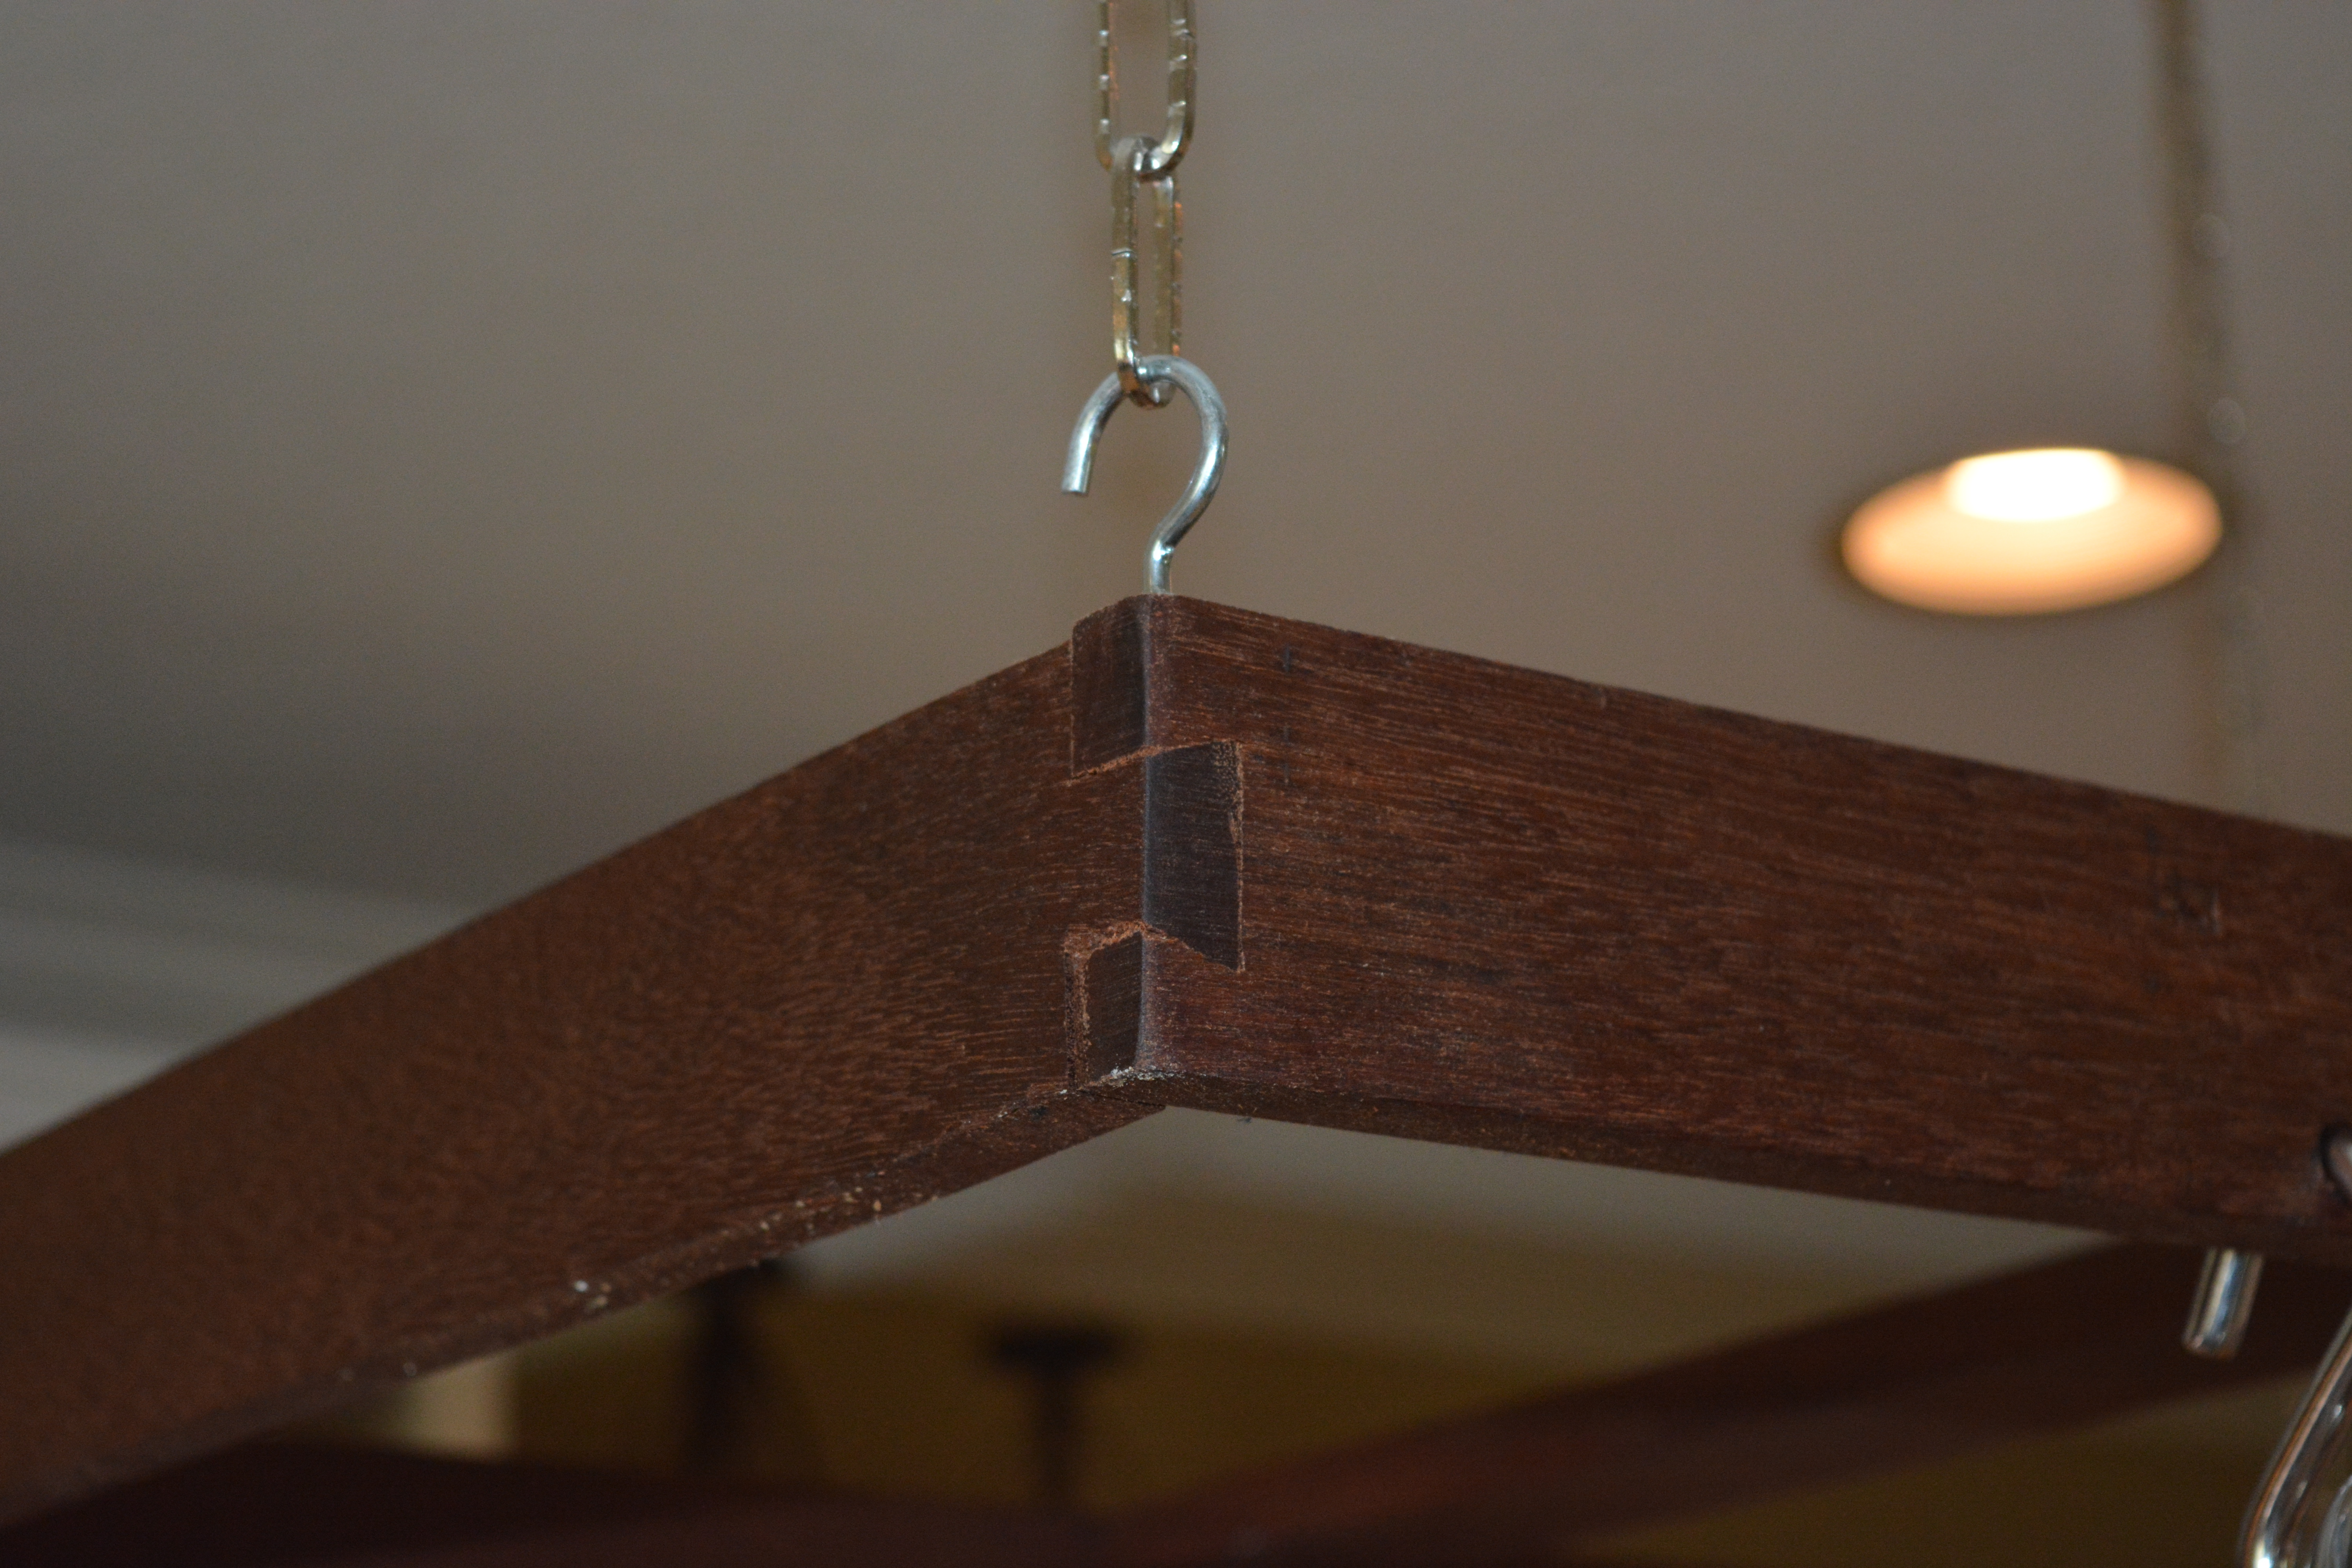
3. Divide each long board into four equal parts. Drill 3 holes, using a 3/8” brad point bit (or a brad point bit a bit thicker than your S hook) a 1/2” from the bottom edge of the long board, on your dividing lines.
4. Cut any joinery needed at this time. If you wish to avoid hand-cut joinery, use screws with countersunk holes to attach short and long sides. Alternatively, use pocket screws to assemble the piece.
5. Disassemble your project and sand all parts to your desired smoothness.
6. Reassemble project, this time with glue.
7. Apply an appropriate finish. For a project such as this, penetrating oil finishes, shellacs and waxes make a great looking piece.
8. Install 1 screw hooks at each corner.
9. Cut your chain into 16″ (or so) lengths. My wife is quite vertically challenged, so we have a two foot chains on each corner.
Installation:
- Place the rack on a flat surface directly below where it should be hung.
- Use a plumb bob to determine where your screw hooks should be installed in the ceiling. Mark with a pencil.
- Installyour drywall anchors at your marks. Screw in your ceiling hooks.

- Hang chain from each ceiling hook. Hang the pot rack.
- Install ‘S’ hooks into pot rack. Hang your pots!

Make it safe & keep the rubber side down this week. Thank you for visiting my practice zone and project showcase. If you wish to lend your support for this site, please like WoodshopCowboy on Facebook or follow me on Twitter. If you are interested in making and education, why not check out Work Notes, a curated set of articles from the web, published every week?

This is very cool! I’ve been thinking about creating a space to hang my pots and pans as they certainly deserve a place to reduce clutter on the worktops.
Thanks Olly – can’t wait to see what you do with it!