
Picture frames make fantastic skill building projects. You can practice joinery and create precision jigs. Frames reward practice and good finishes. They can be made from cheap materials and scraps – meaning they are easy on the pocketbook. All in all, the perfect project to start with.

With one exception. Miter joints – that is, two 45° angles meeting and forming an exact 90° corner….umm, that’s hard. Very hard. So how can you make a simple picture frame with simple joinery that looks great? Over the years, I’ve developed three semi-surefire picture frame designs that are simple to make and look great. Next time you want to frame that special moment, try the next three picture frames: The Salvaged Shutter, The Dead Simple Frame and the Schoolhouse Frame.
The Salvaged Door Frame
Sometimes, instead of making something from scratch, we should just re-use what’s been left over to use. To make this simple frame:
1) Find a solid wood donor – I suggest kitchen cabinet doors, shutters, bi-fold doors, etc. Anything made from solid wood will do.
2) Using a circular saw and guide, table saw, powered miter saw or handsaw, cut the wood down to an appropriate size to your photo. Use hand planes to trim to size.
3) Remove any previous finish with paint strippers, sandpaper, steel wool or wire brushes. Remember to follow any safety directions and wear appropriate safety gear when you strip finishes. Lead paint isn’t common, but old stuff has it. Same goes for dusts and molds.
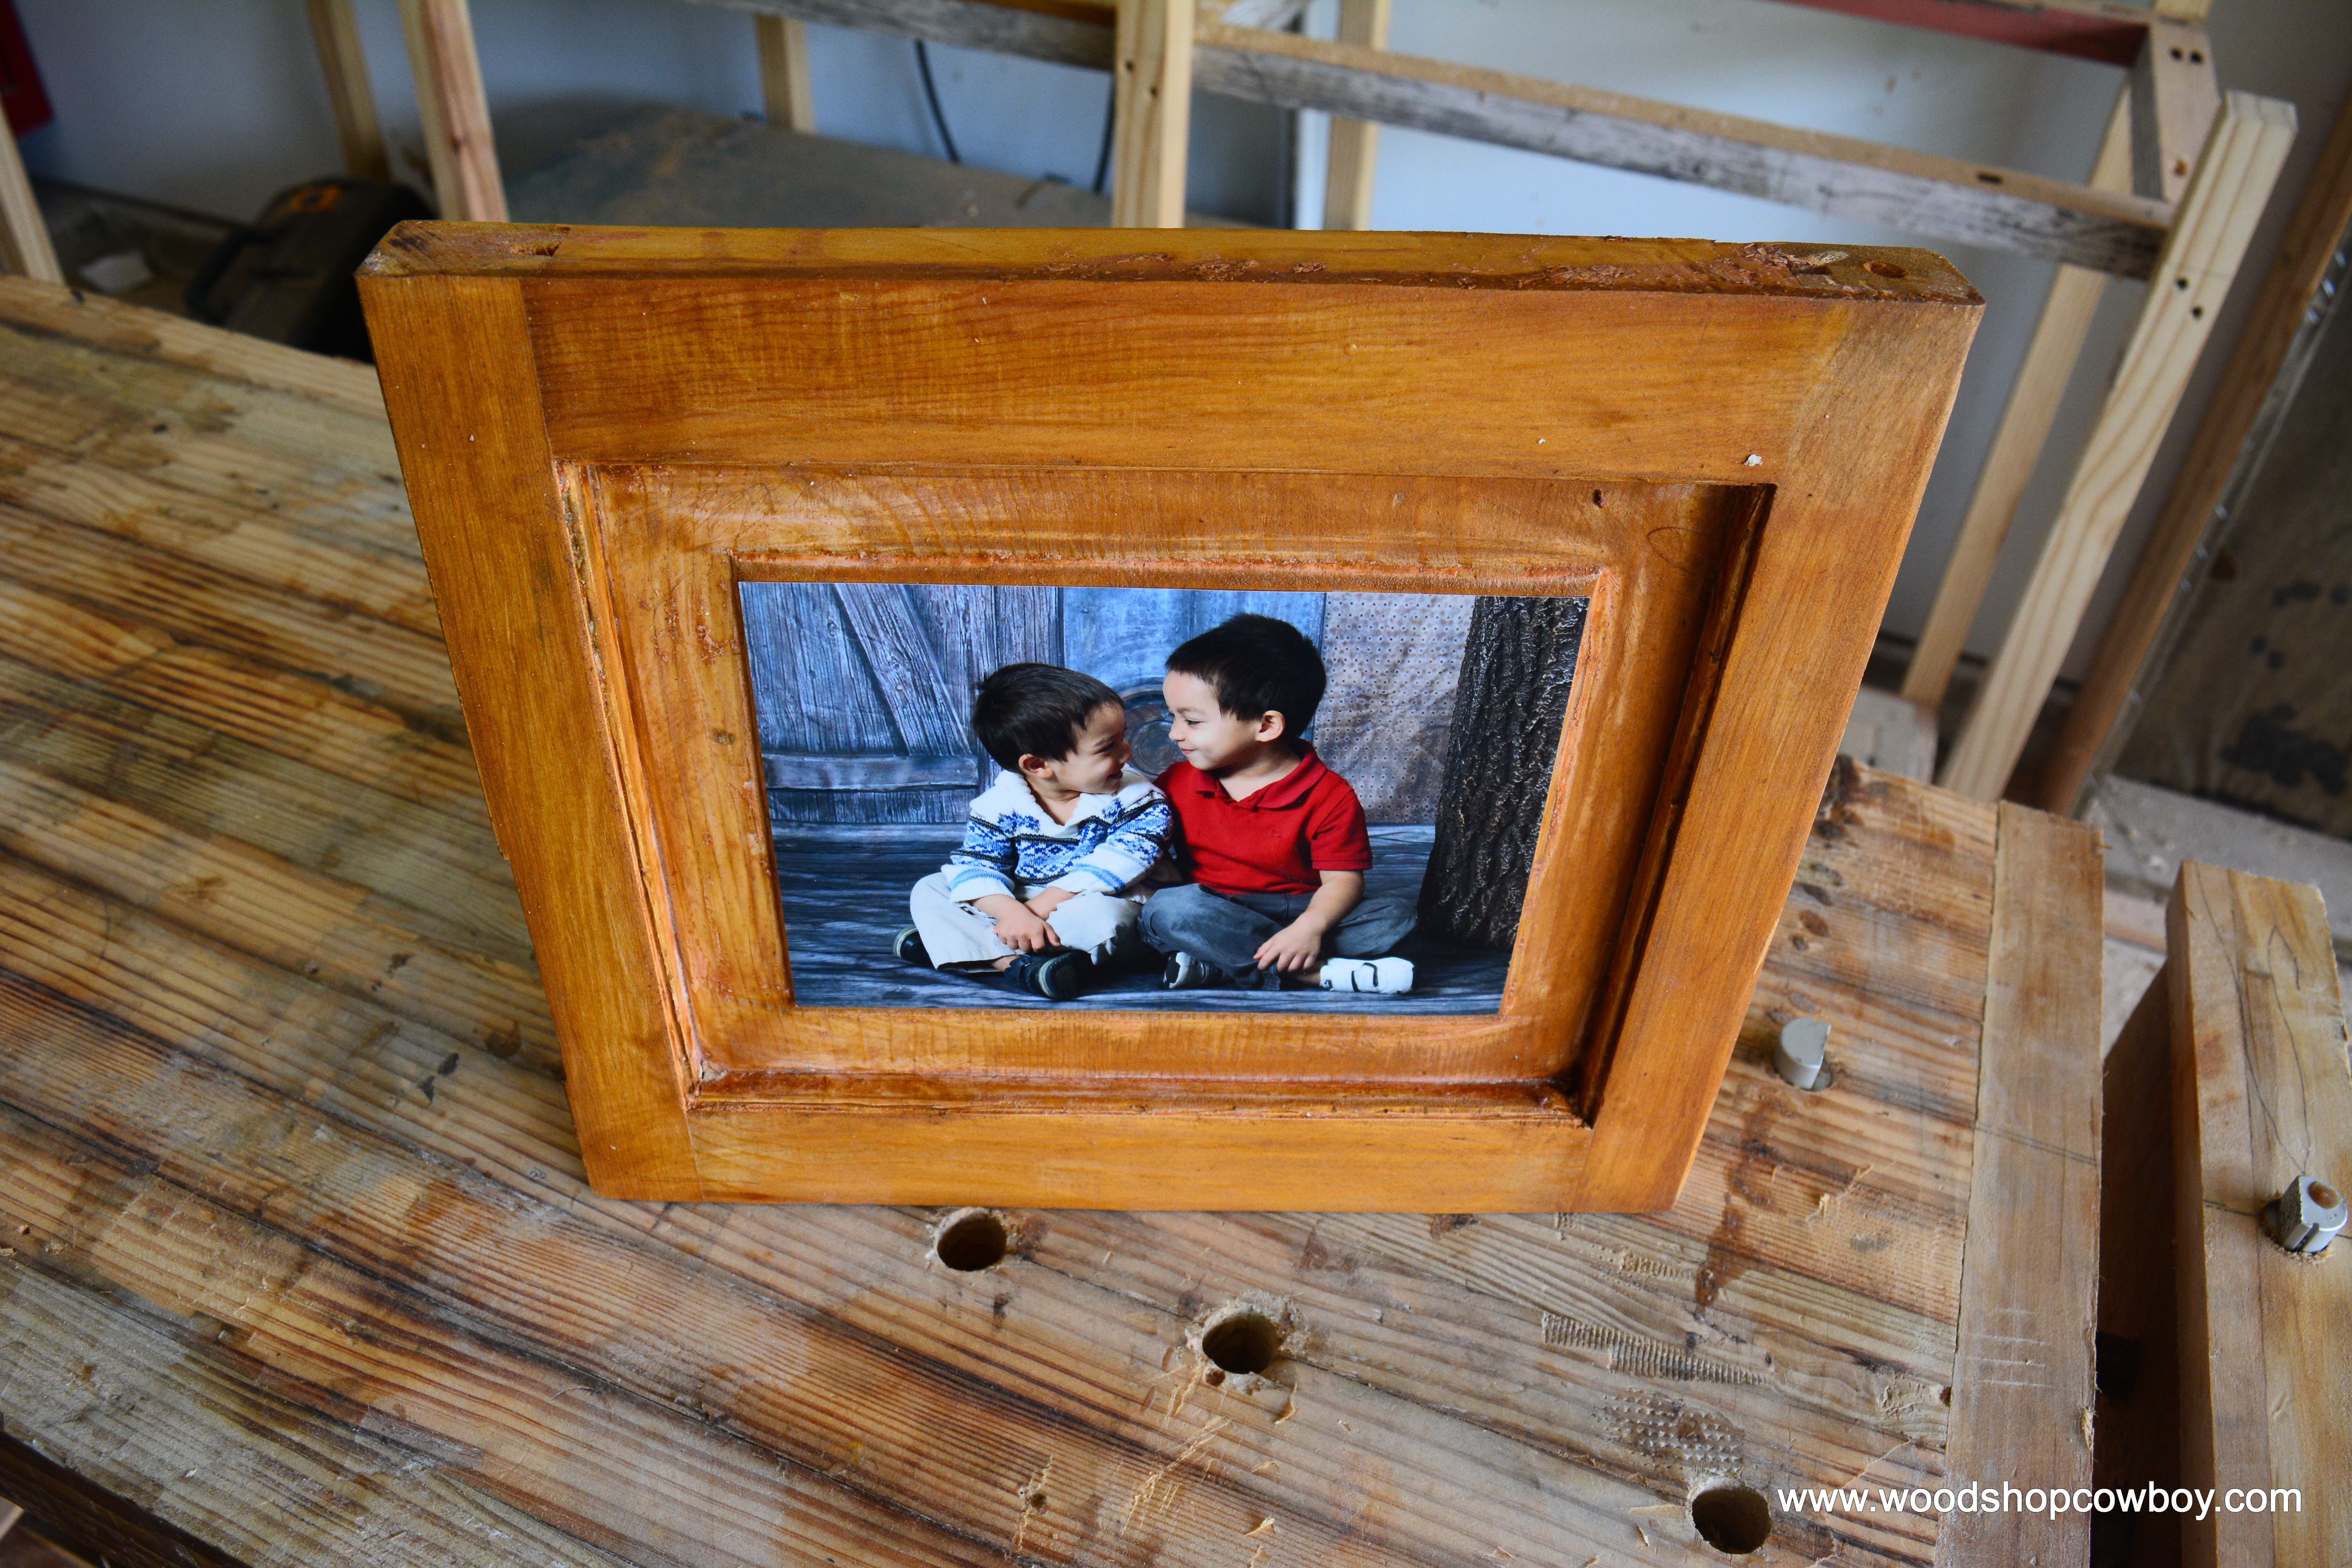
4) Finish with your chosen finishes. I used shellac in this example. Paint and sanding, with a poly and topcoat would look pretty incredible too.
5) Lastly, use Mod Podge Satin as a binder to paste the picture on your board, a la scrapbook style.

The Dead Simple Frame
The Dead Simple frame really needs a better name. I like this frame because it offers a great match between access (no fancy tools) and how it scales up to large sizes and shrinks for small pictures. It’s so simple, even a six-year old could build one.

To make this simple frame:
1) Procure strips of wood of a desired thickness. Poster-sized frames should be made from 3/4” thick material, while you use thinner strips for 8×10 and smaller frames. These can be made on the table saw, bandsaw or bought at a big-box retailer and some lumberyards or craft shops. 1 Strip should be wider than the other strip. For example, in a poster, you could grab a 1×4 and a 1×3.
2) Measure the size of your picture (i.e. a 5 by 7).
3) From the wider stock, Cut 2 strips of wood to length using the following formula (for smaller projects). Label these Part A.
Length of Part A: Length of Picture – 1/2” + 2 * Width of Wider Stock.
For example, a 5×7 photograph. The stock is 1/4” thick and 1” wide. So, using my formula, the length of Part A is 7” Long – 1/2” + (2 * 1”) = 8 1/2” Long
4) From the wider stock, cut 2 strips of wood a 1/2” shorter than your width. Label this Part B.
Again, for a 5×7 photograph, that’s 2 pieces at 5” W – 1/2” = 4 1/2”
5) Now, arrange parts A & B into a rectangle. Check to make sure the photo is bigger than the interior rectangle. Make sure your “show” side is facing down. Double check for square, tight joints.
6) From the thinner stock. Cut 2 strips of wood as long as your picture’s length. Label this as Part C.
For our 5×7 example, Part C = 7”.
7) From the thinner stock, cut 2 strips of wood the to the following formula. Label as Part D.
Length of Part D: Width of Picture + 2 * Width of Wider Stock.
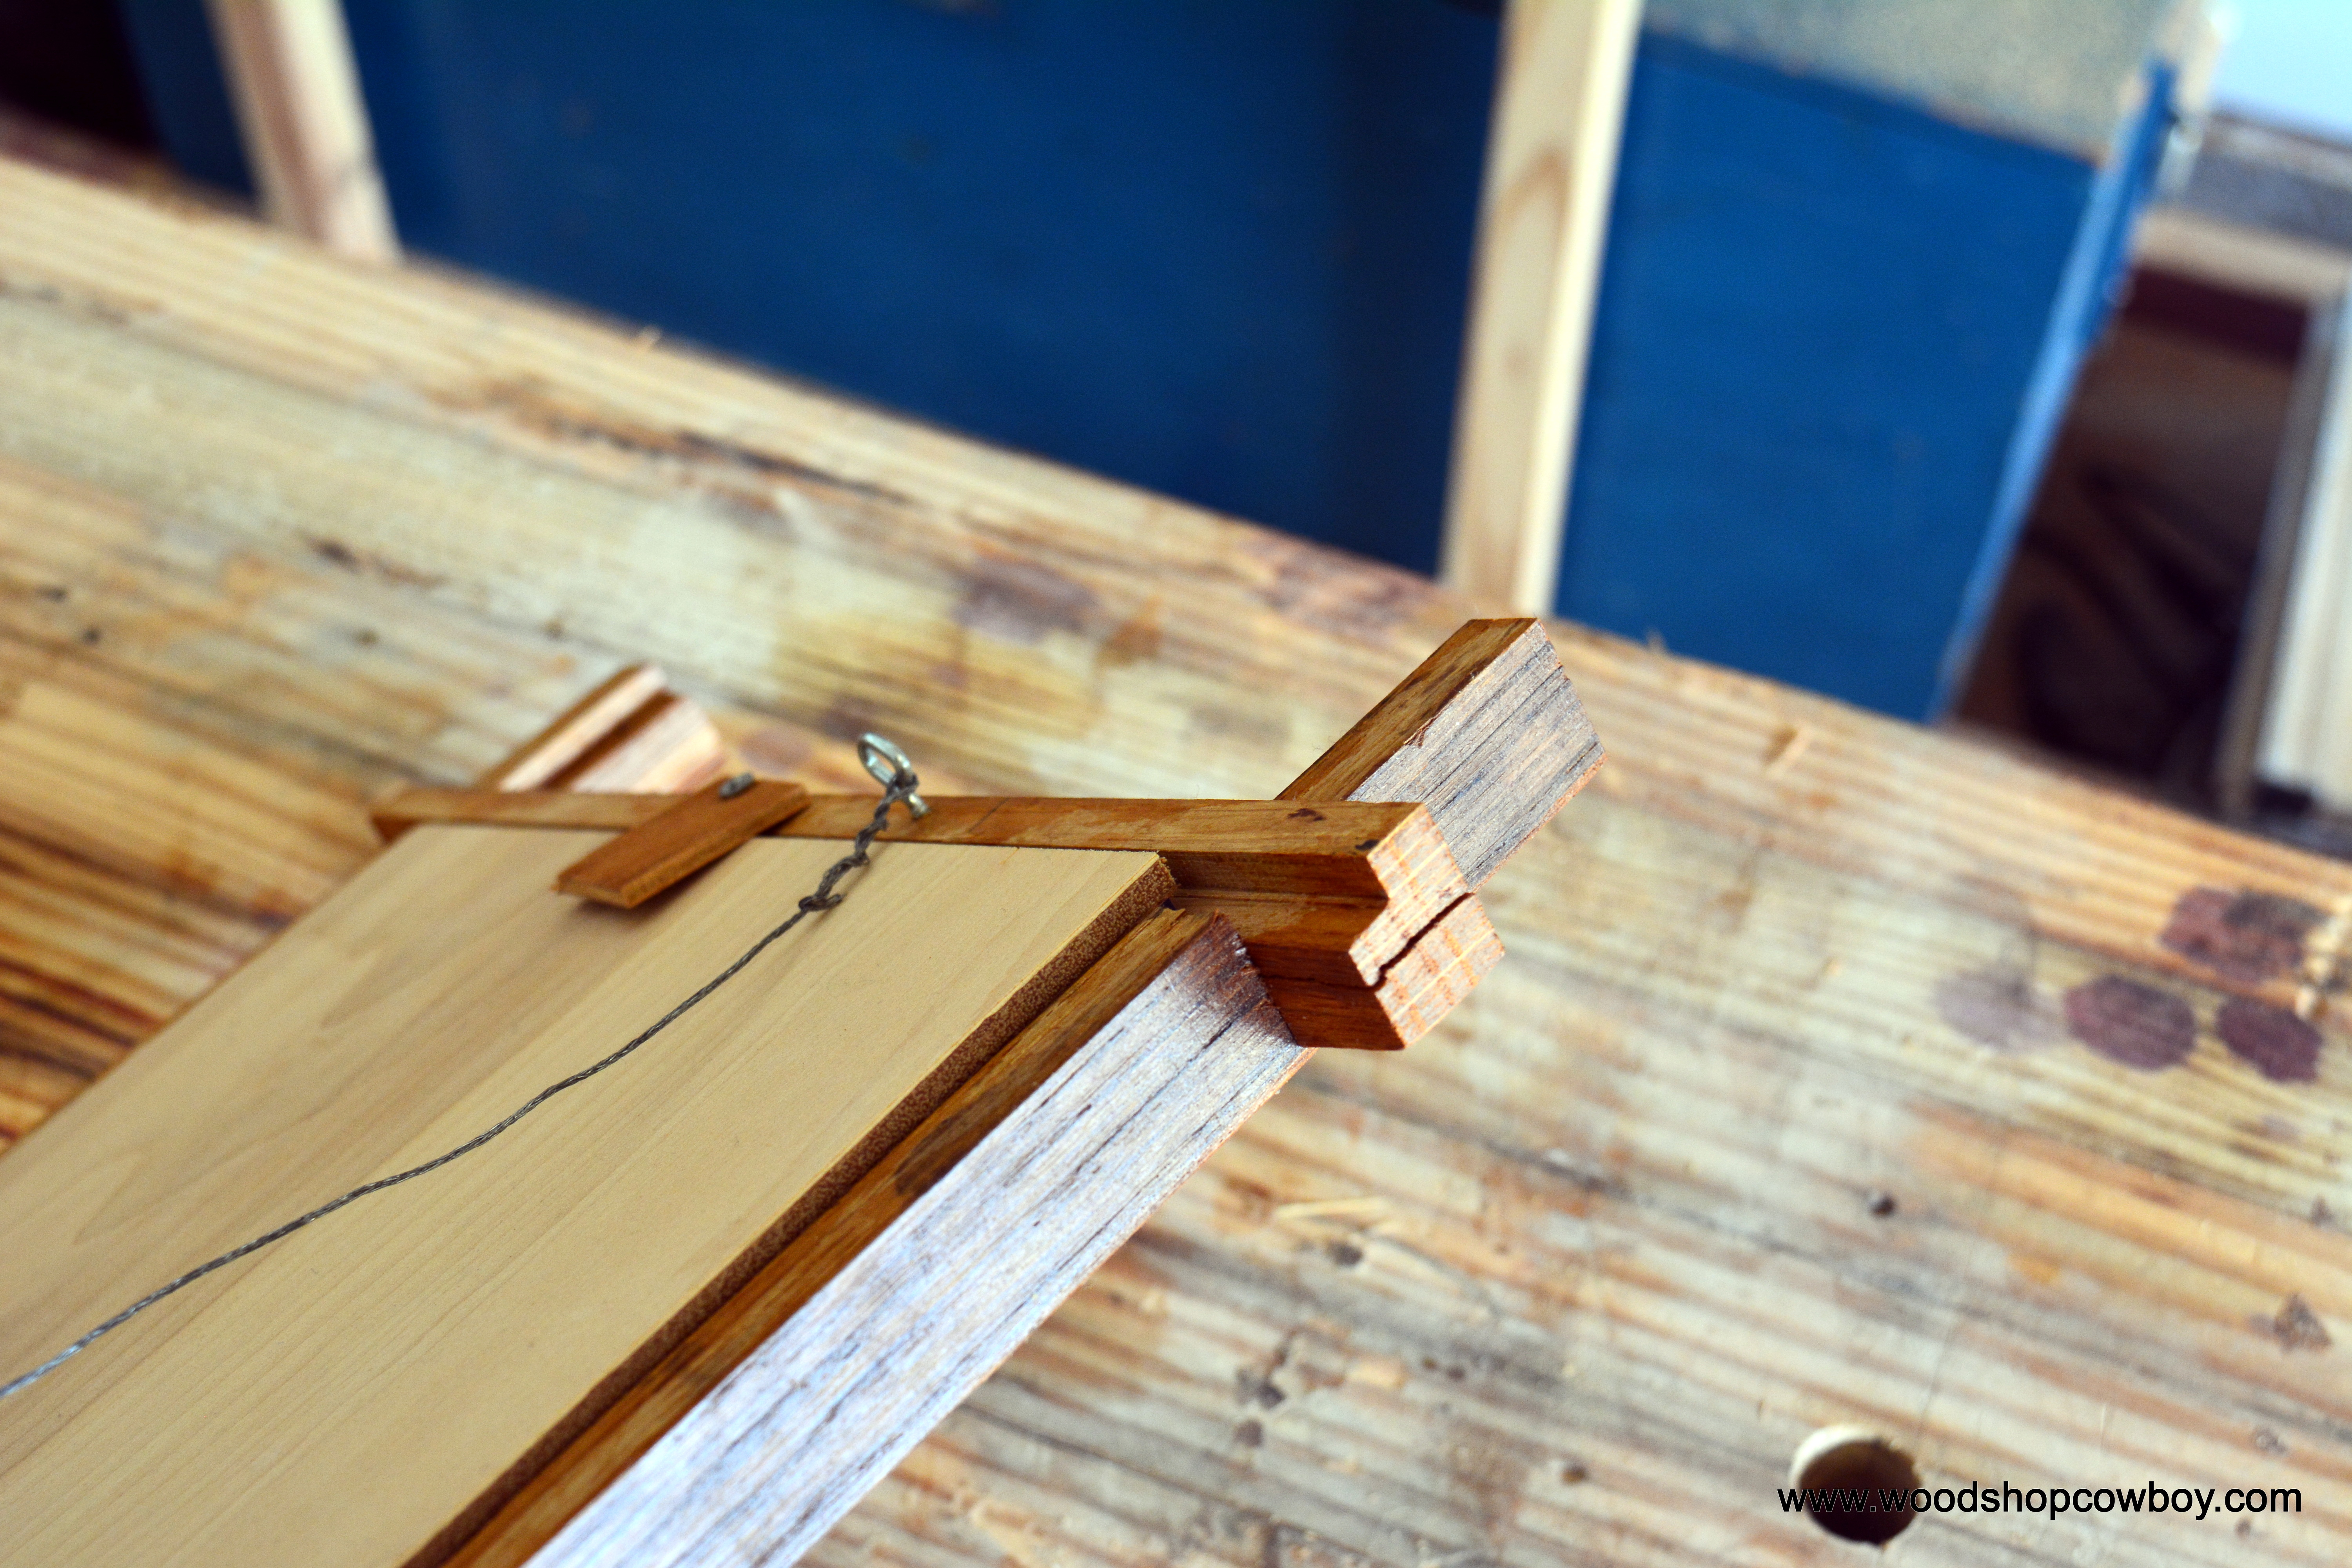
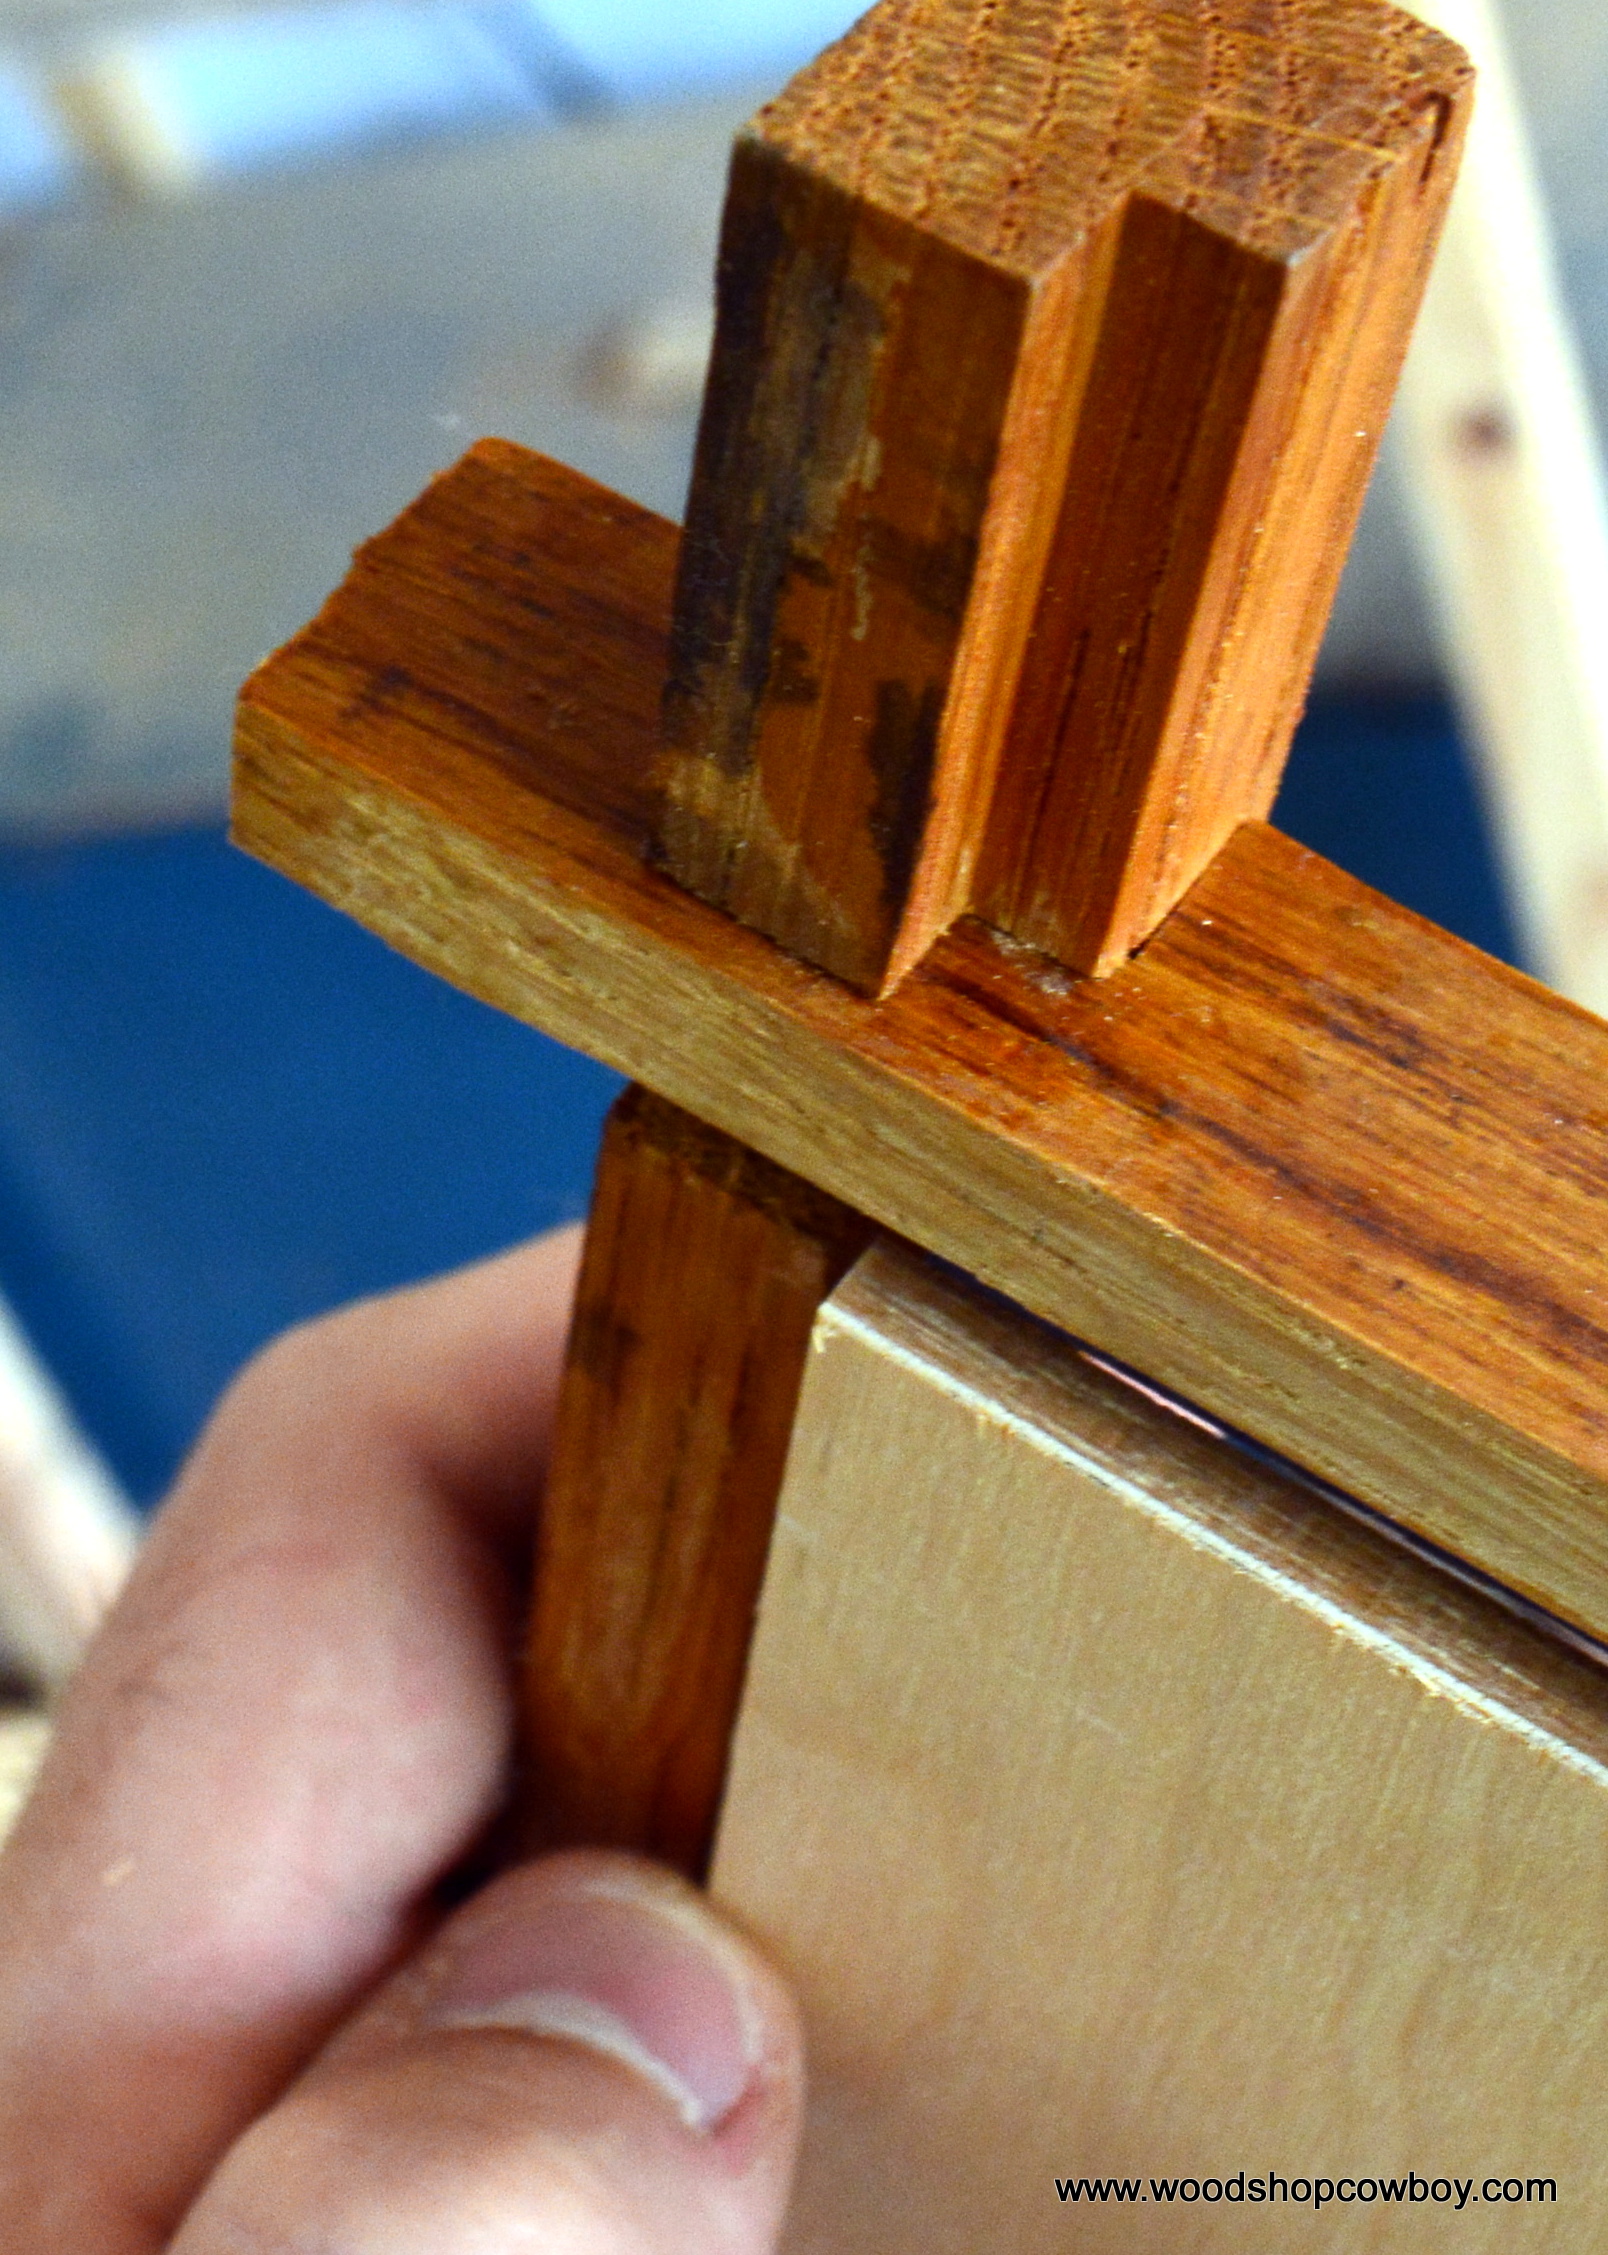
8) Arrange Parts C & D on top of the rectangle formed by Parts A & B. You should see a small shelf, called a rabbit or rebate, formed by the two different stocks. Glue, nail or screw the stocks together in this arrangement.
Finishing a Frame, Securing the Glazing
9) Procure a glass or plastic sheeting the size of your photograph for the glazing. The glazing is the clear layer that protects the photo from the elements. The big-box hardware stores usually sell 5×7, 4×6, 8×10 plastic and glass glazings already cut to size. Custom sizes can be cut at the store in the case of glass. For plastics, I use a table saw with a plywood blade or a plastic scoring tool to cut the sheets down to the correct size.

10) Cut a backing from thin plywood or thick cardboard the size of your photo.
11) Once the frame is dry from gluing and sanded, I finish my frame. I usually use BLO and shellac to finish my work. You can use whatever finish you would like.
12) Sandwich the picture between the glazing and the backing board and place into the frame.
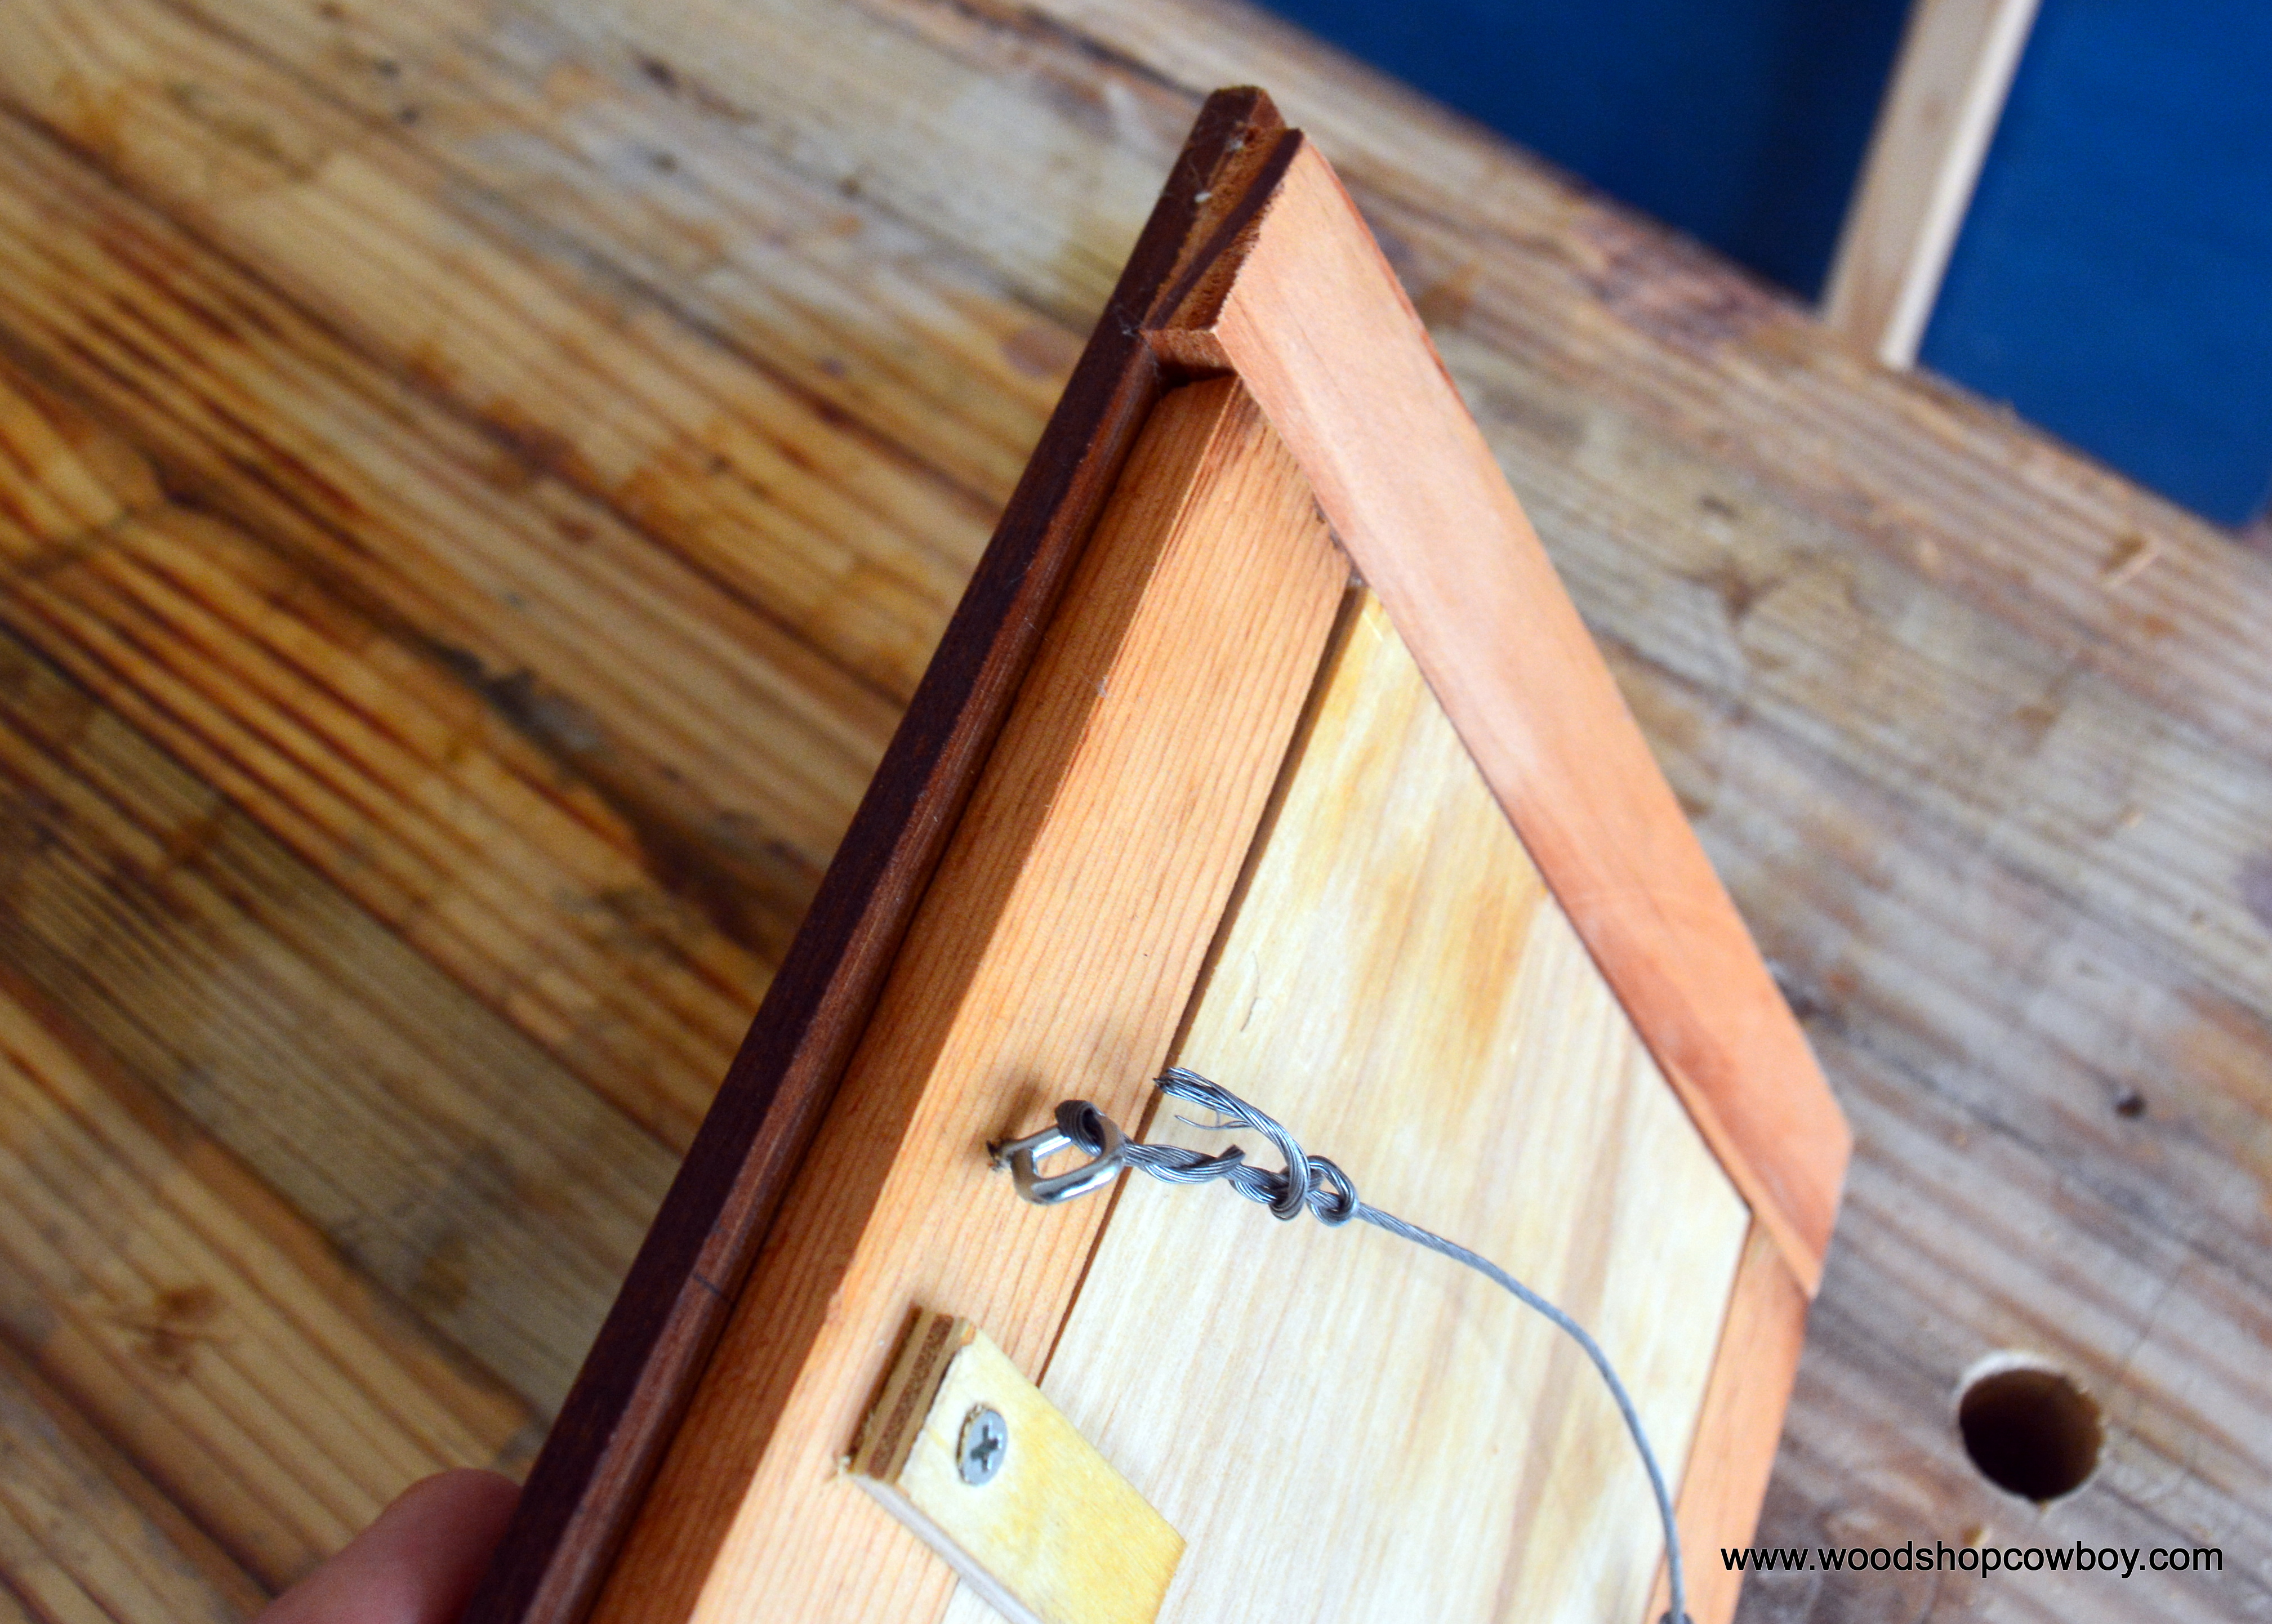
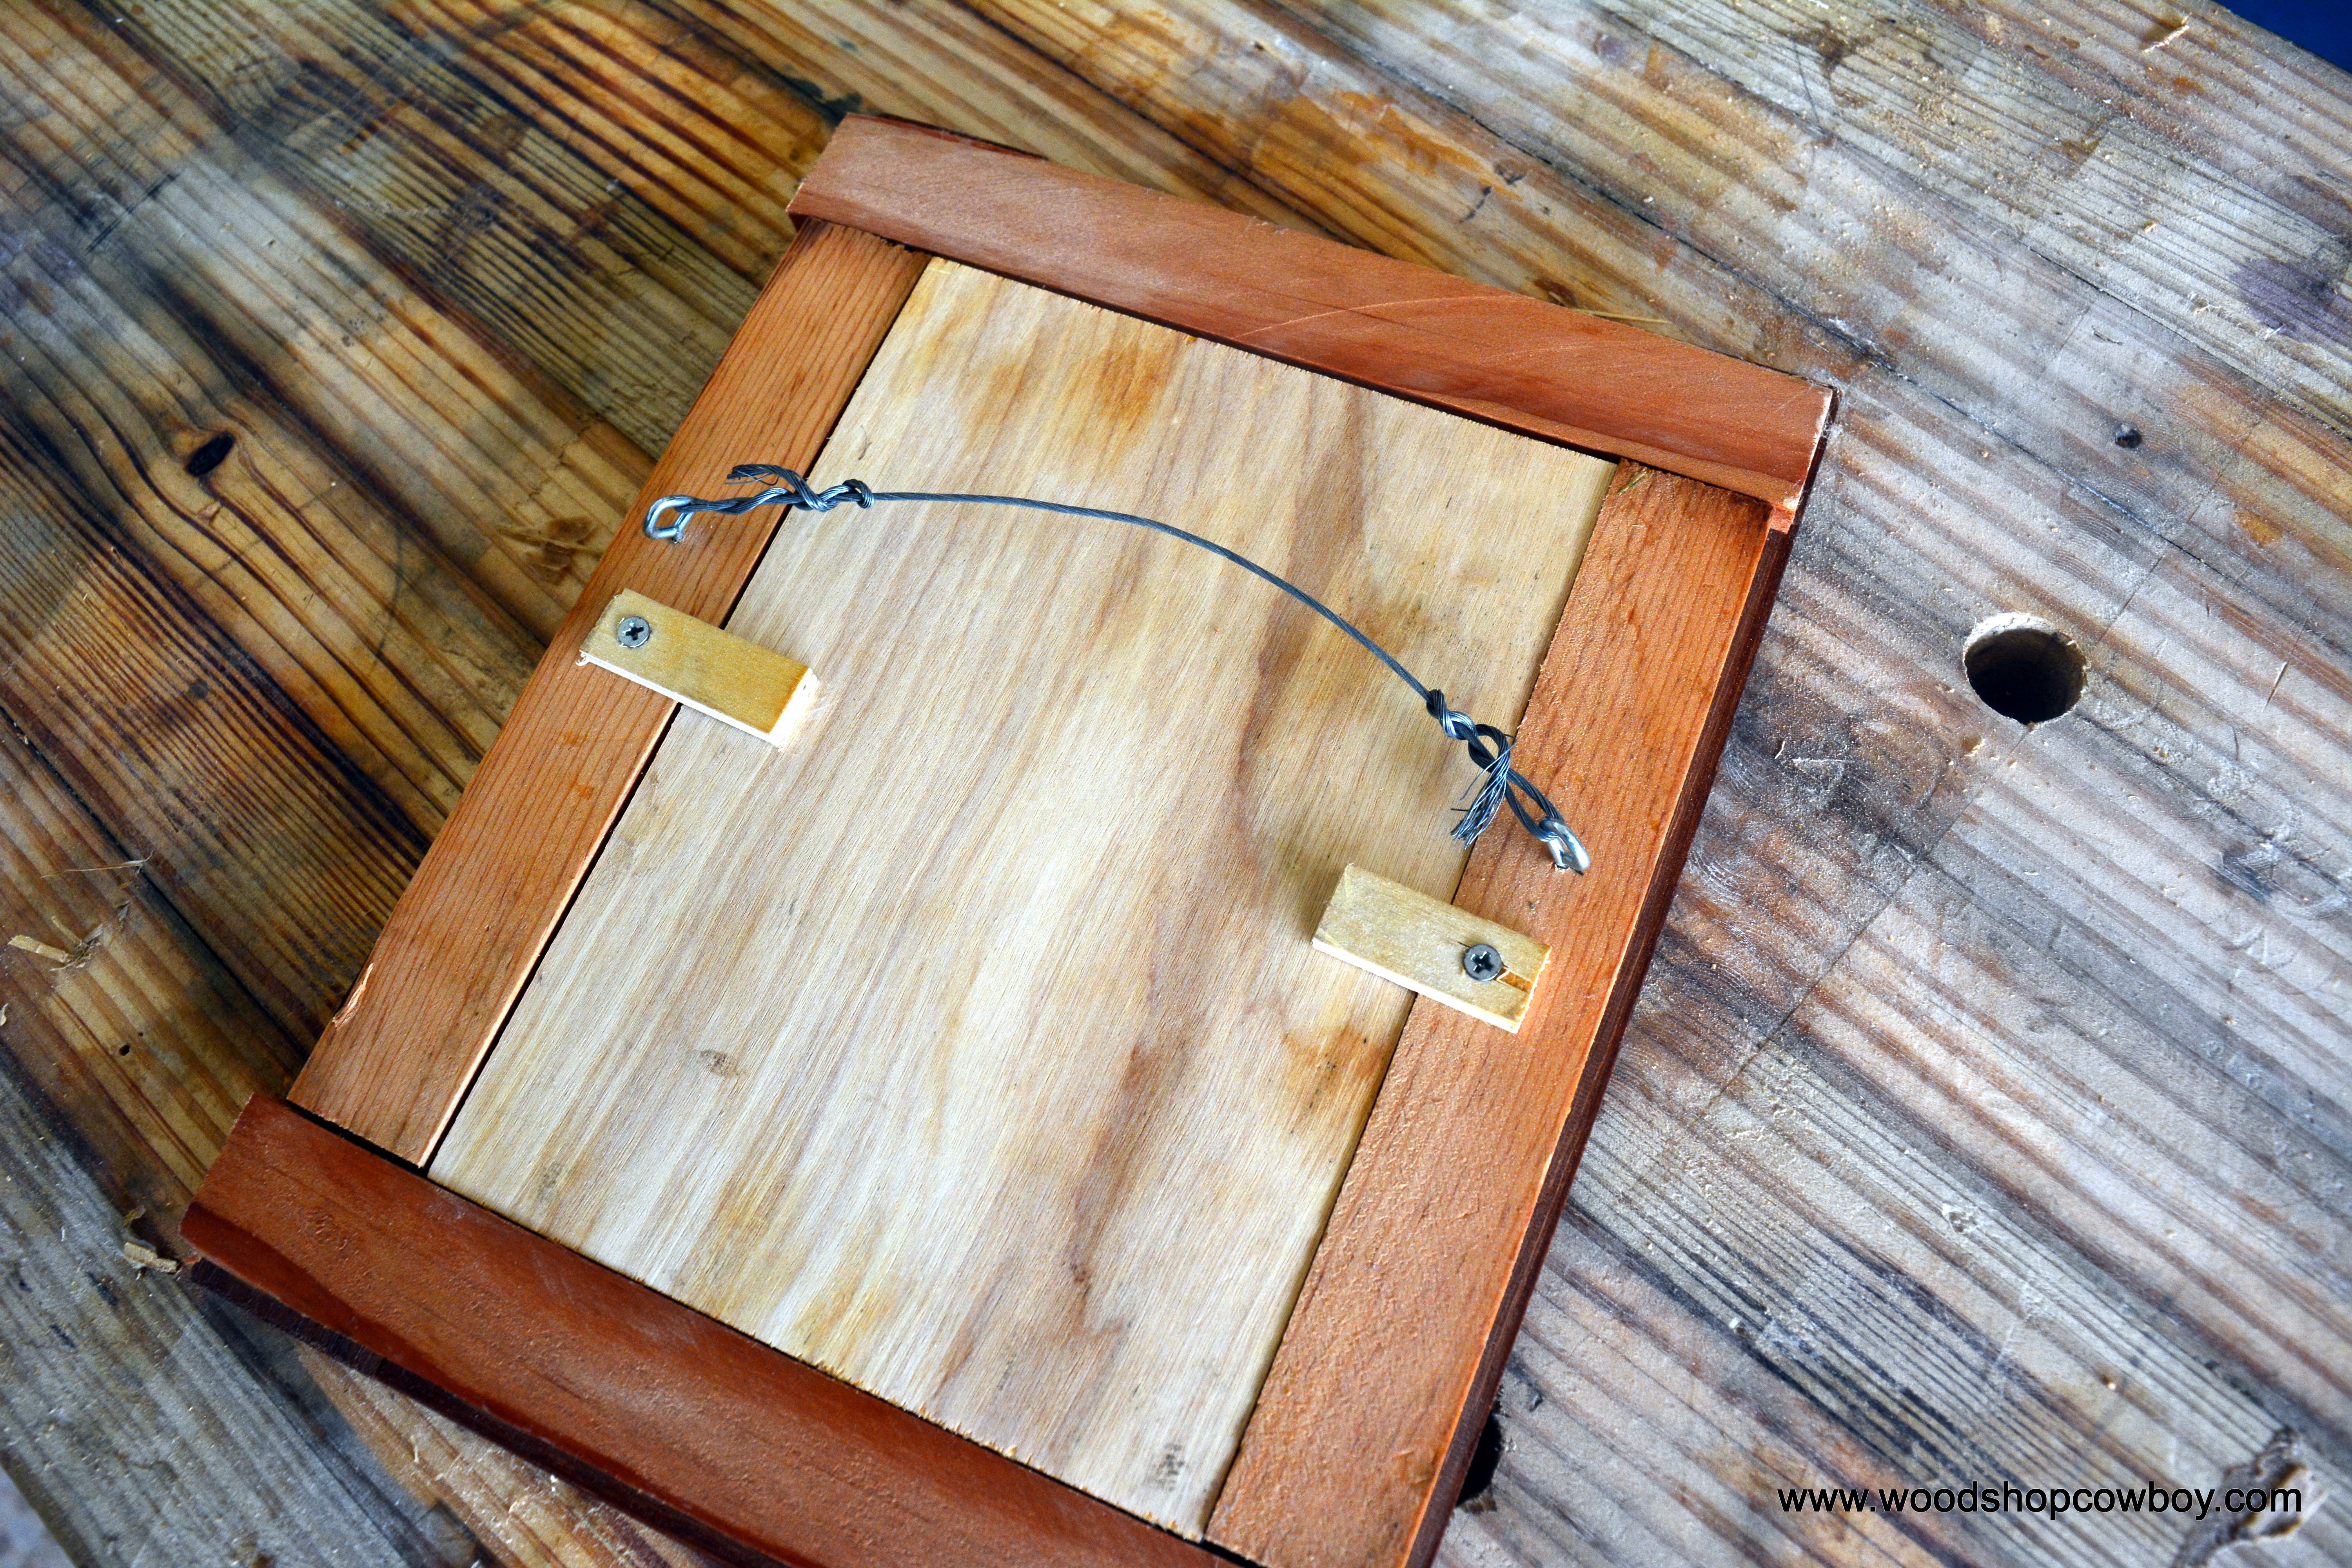
13) Fasten small off cuts onto the frame to hold the back board in place. I use small squares of plywood, but cardboard should work also.
14) Install two eyelets roughly one-third of the way from the top. Tightly wrap picture wire around.
15) Hang on the wall.
Ok. Maybe that wasn’t dead simple. Here’s a child assembling one. It’ll make more sense when you watch it built.
The School House Frame
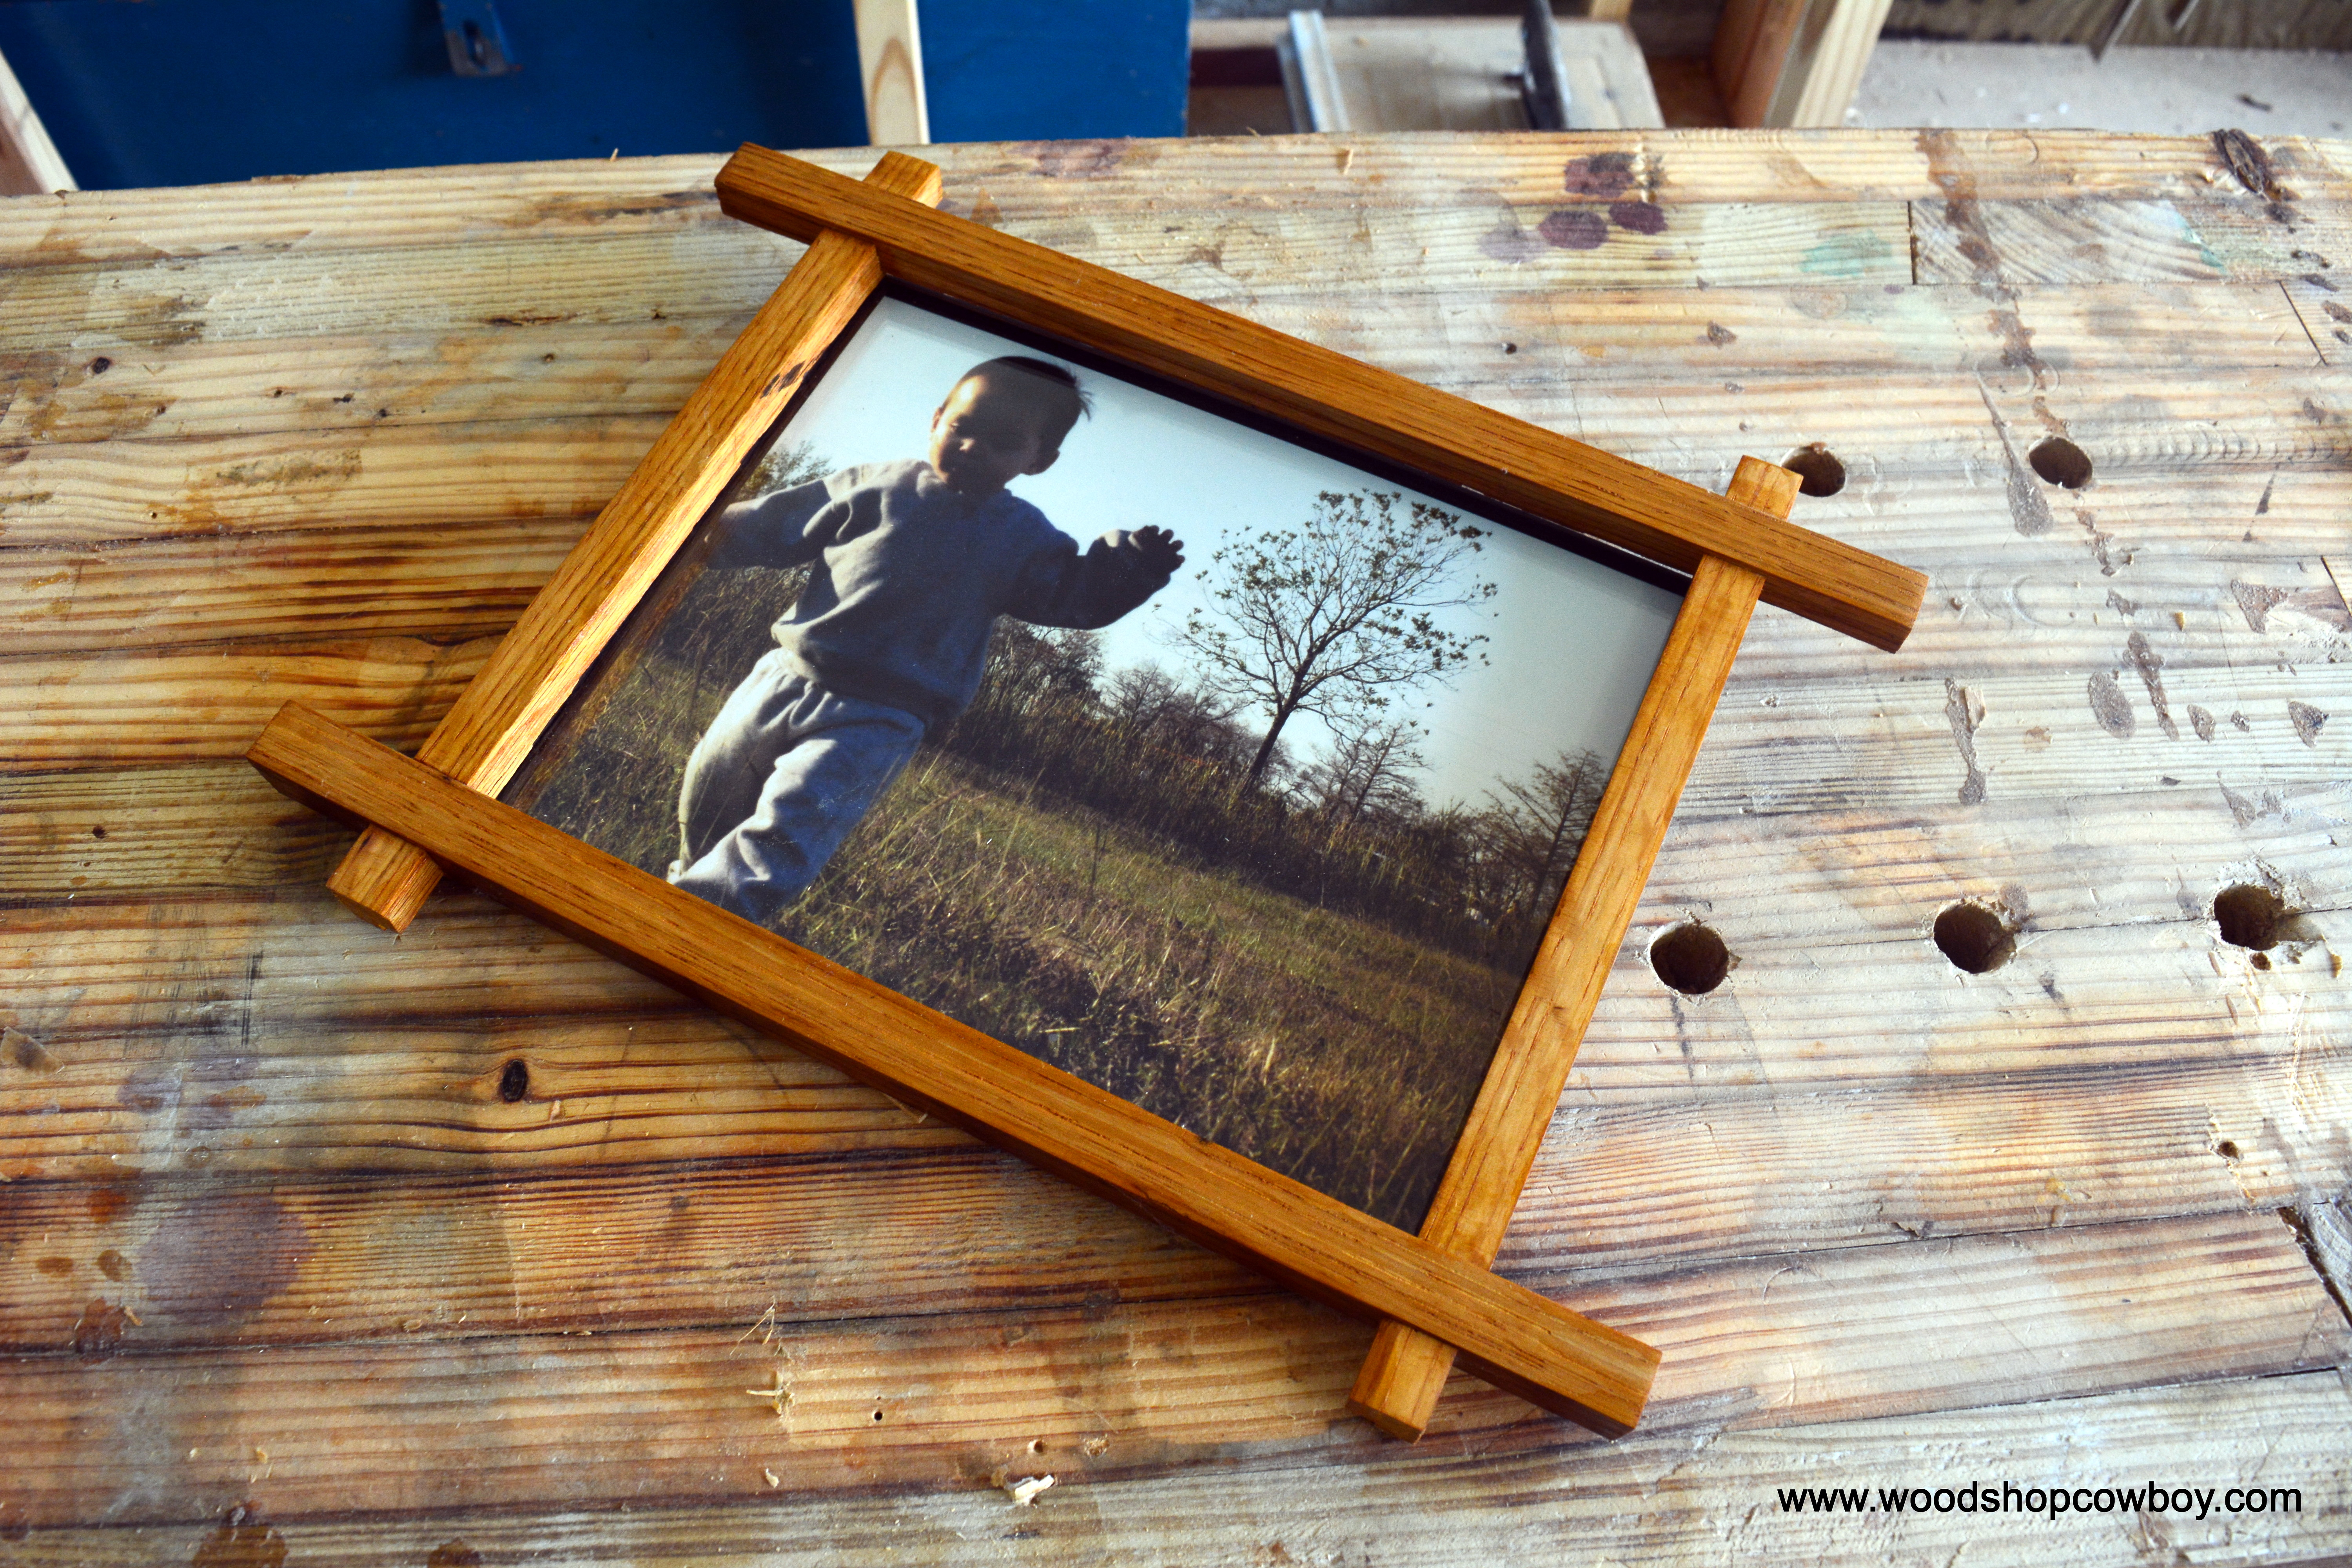
The School House Frame uses half-lap joints to secure the frame. This frame is appropriate for younger people to make if you have the square stock with the rabbet on hand. Making the square stock, on the other hand, requires rabbetting planes or a router. Since I have only a router, that’s the direction I’ll go.
1) Create the square stock. Rip your wood into 3/4” square blanks. In reality, any width will do, but 3/4” seems to work best for smaller, standard sized photo prints 8×10, 5×7, 4×6, etc.
2) Using a table router, table saw or hand plane, plow a small 1/4”x1/4” rabbet into your square stock.
3) Trim your stock to the appropriate size. Add 2” to the photo’s length and width. For example, a 5×7 photograph yields 2 pieces at 7” and 2 pieces at 9”.
4) Carefully locate your half-lap joints. First, make a square mark 1” from each end, then another square mark 1 – 3/4” from each end.
5) Using a handsaw and chisel or dado stack and table saw, cut out your half lap joints.

6) Assemble, making sure your rabbets face into the photo. Double check your photos fit. Adjust if necessary.
7) Glue and clamp up assembly.
8) Finish the frame as described above.
Thank you for visiting my practice zone and project showcase. If you wish to lend your support for this site, please like WoodshopCowboy on Facebook or follow me on Twitter. If you are interested in making and education, why not check out Work Notes, a curated set of articles from the web, published every week?
Make it safe & keep the rubberside down.
