At some point, you have to cut that board in half. Learn to do it right in today’s Tool Primer: The Power Miter Saw.

The powered miter saw does on thing extremely well in the workshop. It crosscuts (going across the wood grain) wood with great accuracy. Often, miter saws can crosscut at an angle to create miters (two pieces of wood matching up at an angle other than 90 degrees) and at an angle on the vertical plane, called a bevel. They come in many sizes, from small to medium to large. Newer ones have two bars which slide the blade back and forth. These sliding miter saws can cut a board upwards of 12” wide quickly, accurately and safely.
The powered miter saw (or cut-off saw) came into the woodworking market in the late 70’s/early 80’s and directly competed with the radial arm saw in purpose in the shop. Radial arm saws could do everything a powered miter saw could do and more but powered miter saws have three advantages. First, they have more precision than radial arm saws and they stay accurate. They are smaller than radial arm saws, meaning you can store a powered miter saw out of the way when not in use and not lose floor space to one single operation. Lastly, they are cheaper to produce and buy. And cheaper always wins.

The powered miter saw replaces two hand tools, the hand saw and miter box, or a larger panel saw. Hand saws take a bit of time to learn to saw accurately. Jigs such as a miter box or shooting board help immensely – in fact, a well set-up miter box and shooting board can out-precision a powered miter saw any day of the week. And hand work is infinitely more flexible than machine work. Powered miter saws save time over hand saws in this operation – especially if you spend some time and accurately set up your saw for fine woodworking.
So let’s get to the powered saw itself. The saw consists of a metal frame and fence which supports the workpiece during the cut. A motor housing and blade are positioned above the workpiece and attached to the metal frame via a hinge, sliding rods or a series of hinges. The operator positions the workpiece on the metal bed and against the fence underneath the saw blade. Using the trigger switch integrated into the handle, the operator turns on the saw, lowers the blade and makes the cut.

Powered miter saws come three main sizes of saws: 8”, 10” and 12”. This refers to the diameter of the circular blade. The larger the saw size, the wider the workpiece a saw can cut through. I recommend buying the powered miter saw size which matches your table saw blade. For example, my tablesaw has a 10” blade, so I bought a 10” powered miter saw. I can now use my crosscut blades on either machine, which comes in handy if I want to upgrade my saw blade but still save some money.
Compound power miter saws offer the ability to cut miters (non-90 degree cuts on the horizontal axis) and bevels (non-90 degree cuts on the vertical axis). Single-bevel saws only cut on one axis. While single-bevel units are generally cheaper for the quality, compound miter saws offer far more flexibility in types of cuts. I recommend a compound or double-bevel powered miter saw.
Lastly – sliding or no? The answer here lies in your comfort level and needs. Sliding saws are substantially larger than hinged saws. Sliding saws are also generally more expensive than hinged saws. If space or price is an issue, hinged saws win. On the other hand, sliding saws increase the cross cutting capacity by a substantial amount – from about 5” to 12”. Safety precautions are increased with sliding saws. Inexperienced or inattentive users can place their fingers behind the saw blade accidently with a sliding saw, which can result in an injury. While the same thing can happen with a hinged saw, I feel the sliding saw increases that risk dramatically. Check out the picture below to see what I mean.

For beginning woodworkers, I recommend getting a compound powered miter saw the same sized blade as their table saw. Sliding rails is a bonus, but not necessary. I have both in my various shops and truly prefer the lighter hinged models over the sliding miter saws. I would only avoid cheap import brands because you want the most accurate saw possible with few issues. I’ve used Hitachi, Ryobi, Rigid and DeWalt brands – all work, all have their pros and cons, but not enough for me to recommend more than another. Lastly, spend the extra money for a decent crosscutting blade. Irwin, Freud and Avanti are all good brands and can be found at the Big Box stores.
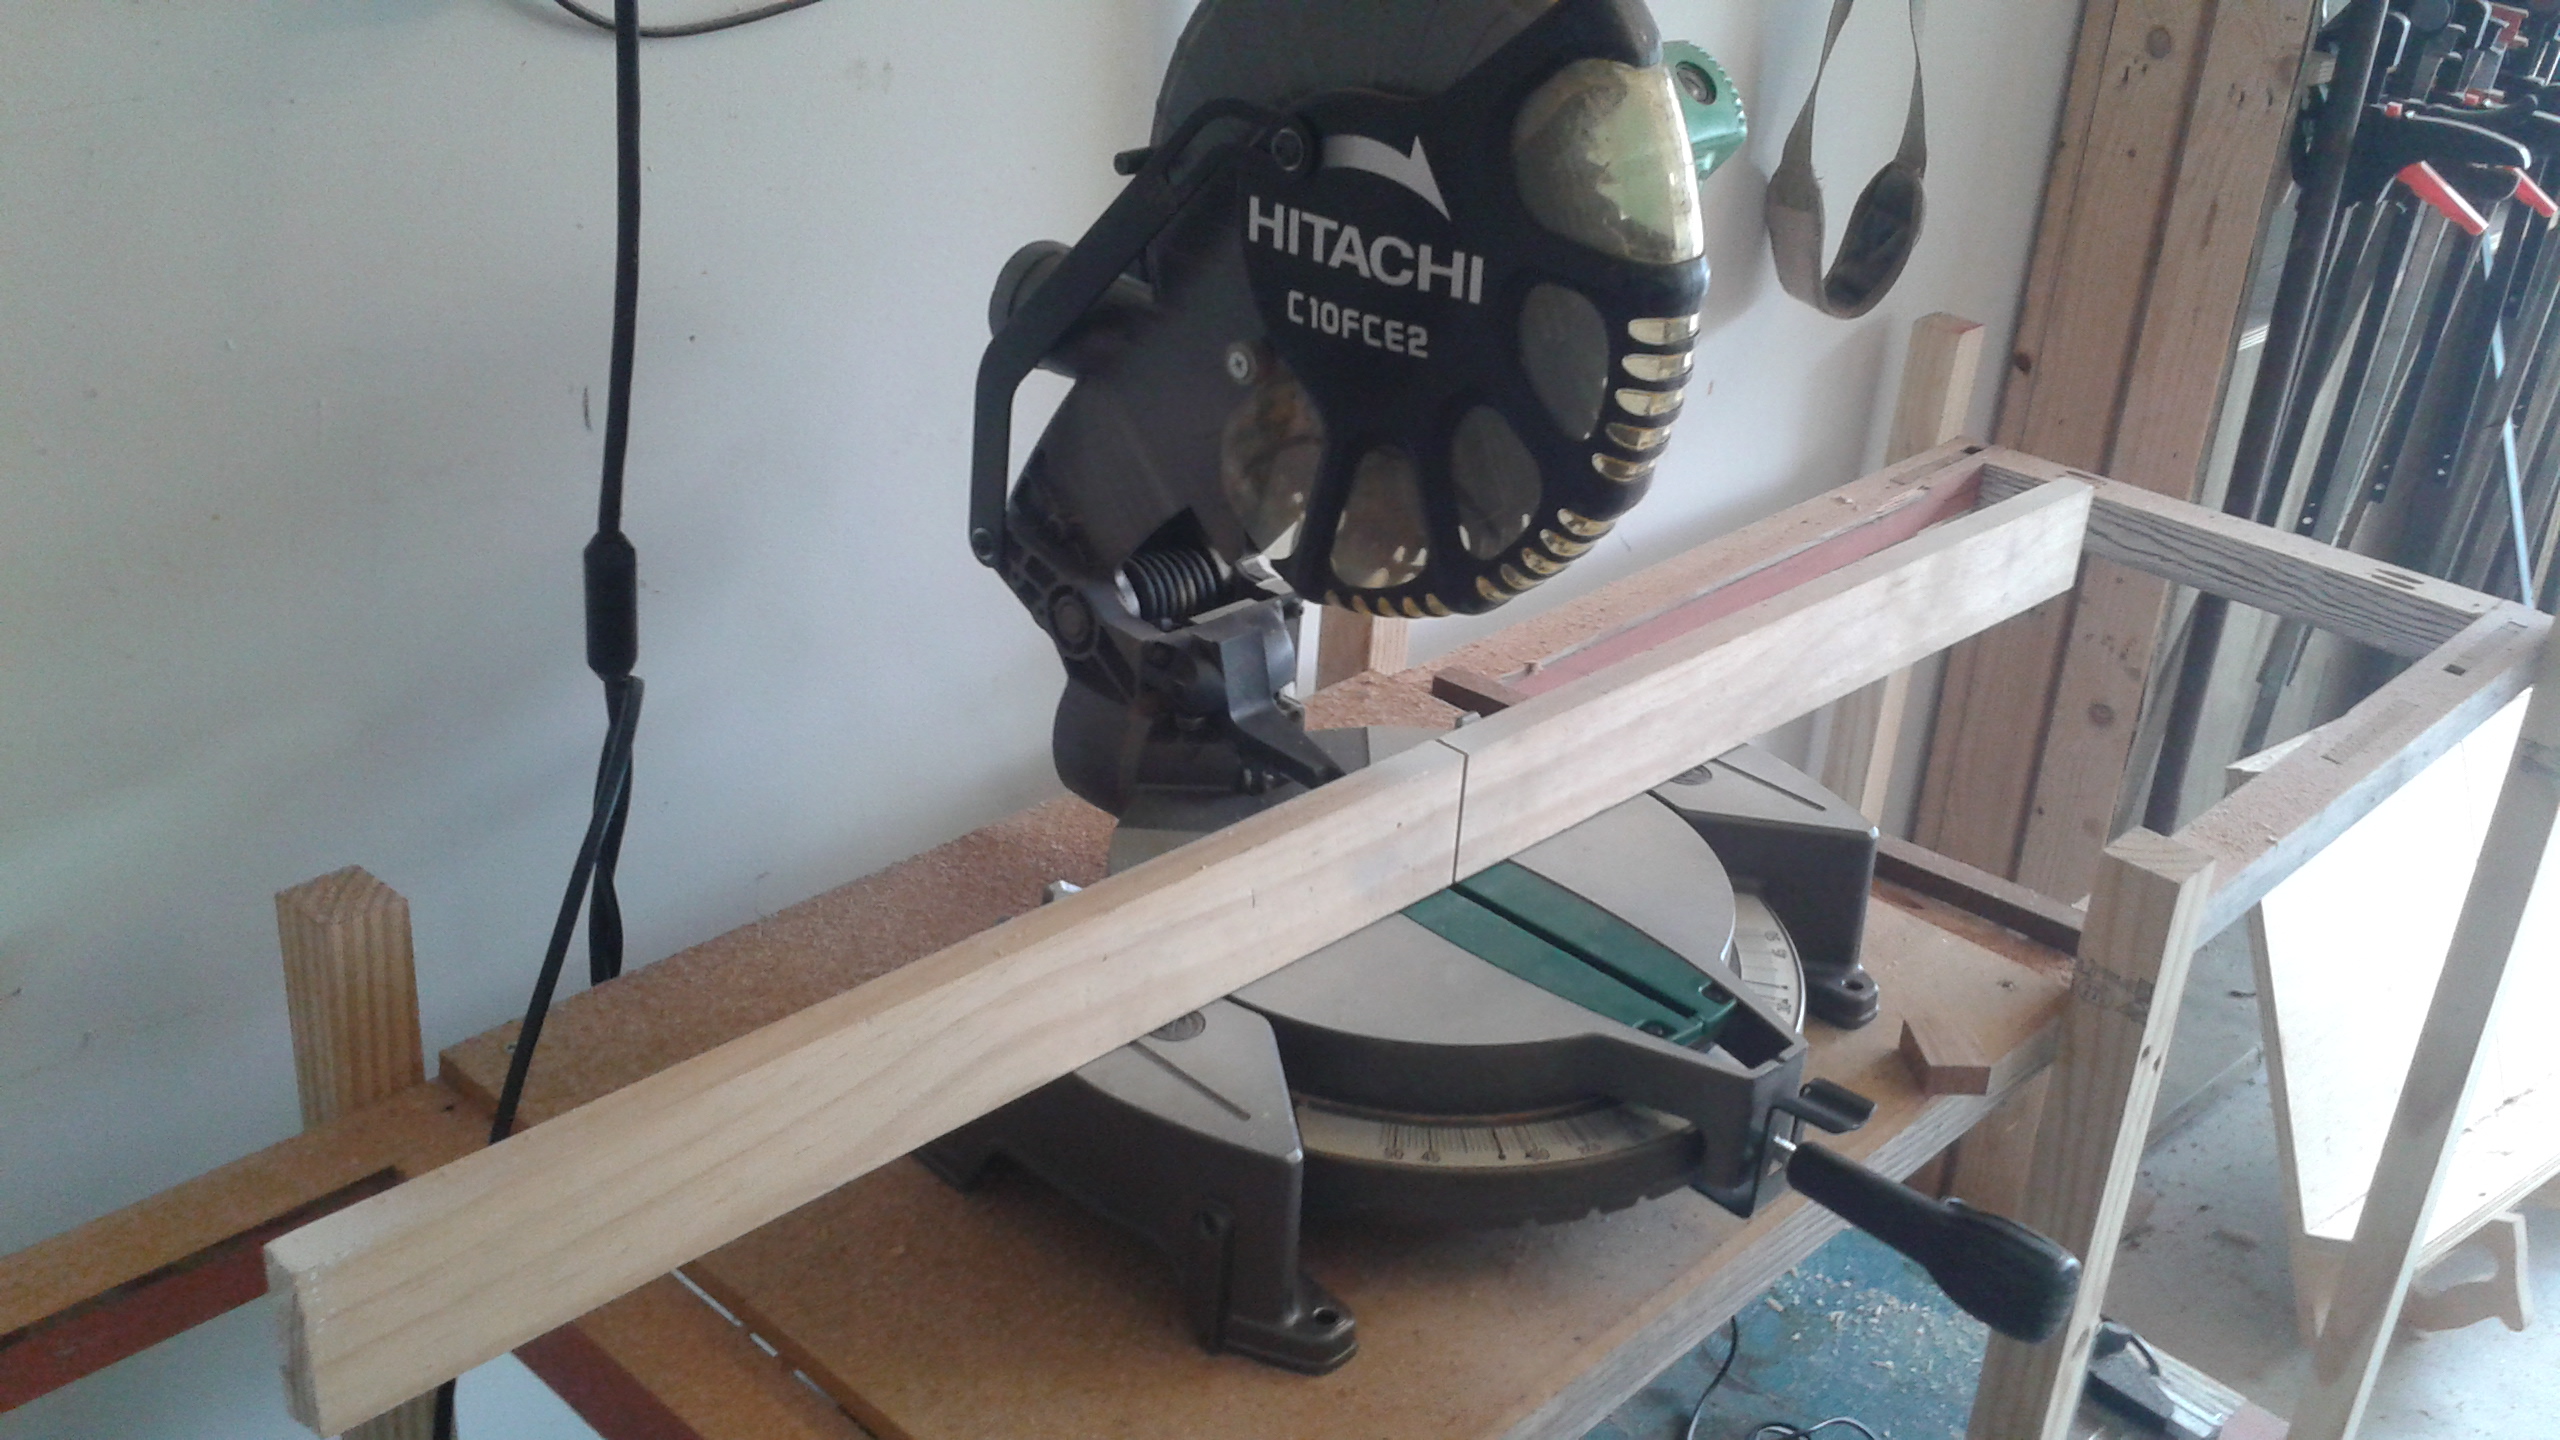
Setting up your miter saw for perfection takes a little while, but it’s worth it. First, I attach a long strip of wood to the fence, as shown in the picture. This sacrificial fence decreases my capacity, but it provides a place to clamp stops – small chunks of wood which make it easy to make repeatable cuts – and minimizes tear-out during precision cuts. I can also attach some sort of tape to the fence to mark different lengths. I also check my saw for squareness in the horizontal and vertical directions. Using the user’s manual, with the machine unplugged, I adjust the machine so I have dead on accurate 90 degree cuts. I periodically check my cuts (once a year or when something looks off) for squareness and readjust the machine as necessary.
A miter stand or cabinet will support long pieces and make your work safer. A quick look online shows off many, many versions of a miter stand, so find the one that fits you, and build it. Your work will improve and you will be amazed at the results.

Thank you for visiting my practice zone and project showcase. If you wish to lend your support for this site, please like WoodshopCowboy on Facebook or follow me on Twitter. If you are interested in making and education, why not check out Work Notes, a curated set of articles from the web, published every week?
Make it safe & keep the rubberside down.
